
HTML Email Editor
With the HTML Email editor, you can manage the HTML of your email template. Upload your own HTML file or begin from scratch, and view your changes in real time as you build.
Topics Covered in This Article
Before Getting Started
- Only .html files may be uploaded to the Custom HTML Editor
- To meet CAN-SPAM and other anti-spam regulations, a compliance footer is added automatically.
- Benchmark Email adds the email footer that includes your company's name, mailing address, unsubscribe link, and report abuse link. This footer uses the same settings as the drag-and-drop editor and can't be removed.
About HTML Email Editor
The Custom HTML Email Editor lets you control the HTML markup of your entire email body rather than building it block by block. Upload an HTML file you already have or start from scratch, then edit the HTML directly in a side panel and see your changes rendered instantly next to it.

The HTML Email Editor is designed for anyone who already has HTML available: whether a designer or agency provided a template, you exported one from another platform, or an AI tool generated it for you.
How to use the HTML Email Editor
The HTML Email Editor can be accessed through the Create Email option on the Emails page or the homepage.
| Homepage Dashboard | Emails Dashboard |
|---|---|
|
|
|


To get started, log in to your Benchmark Email account.
- Go to Emails and click Create Email.
- Select Custom HTML as your design type.
- Choose a template:
- Start from Scratch — opens a blank editor.
- Upload HTML — select an HTML file from your computer.

Next: Edit and Preview Your HTML
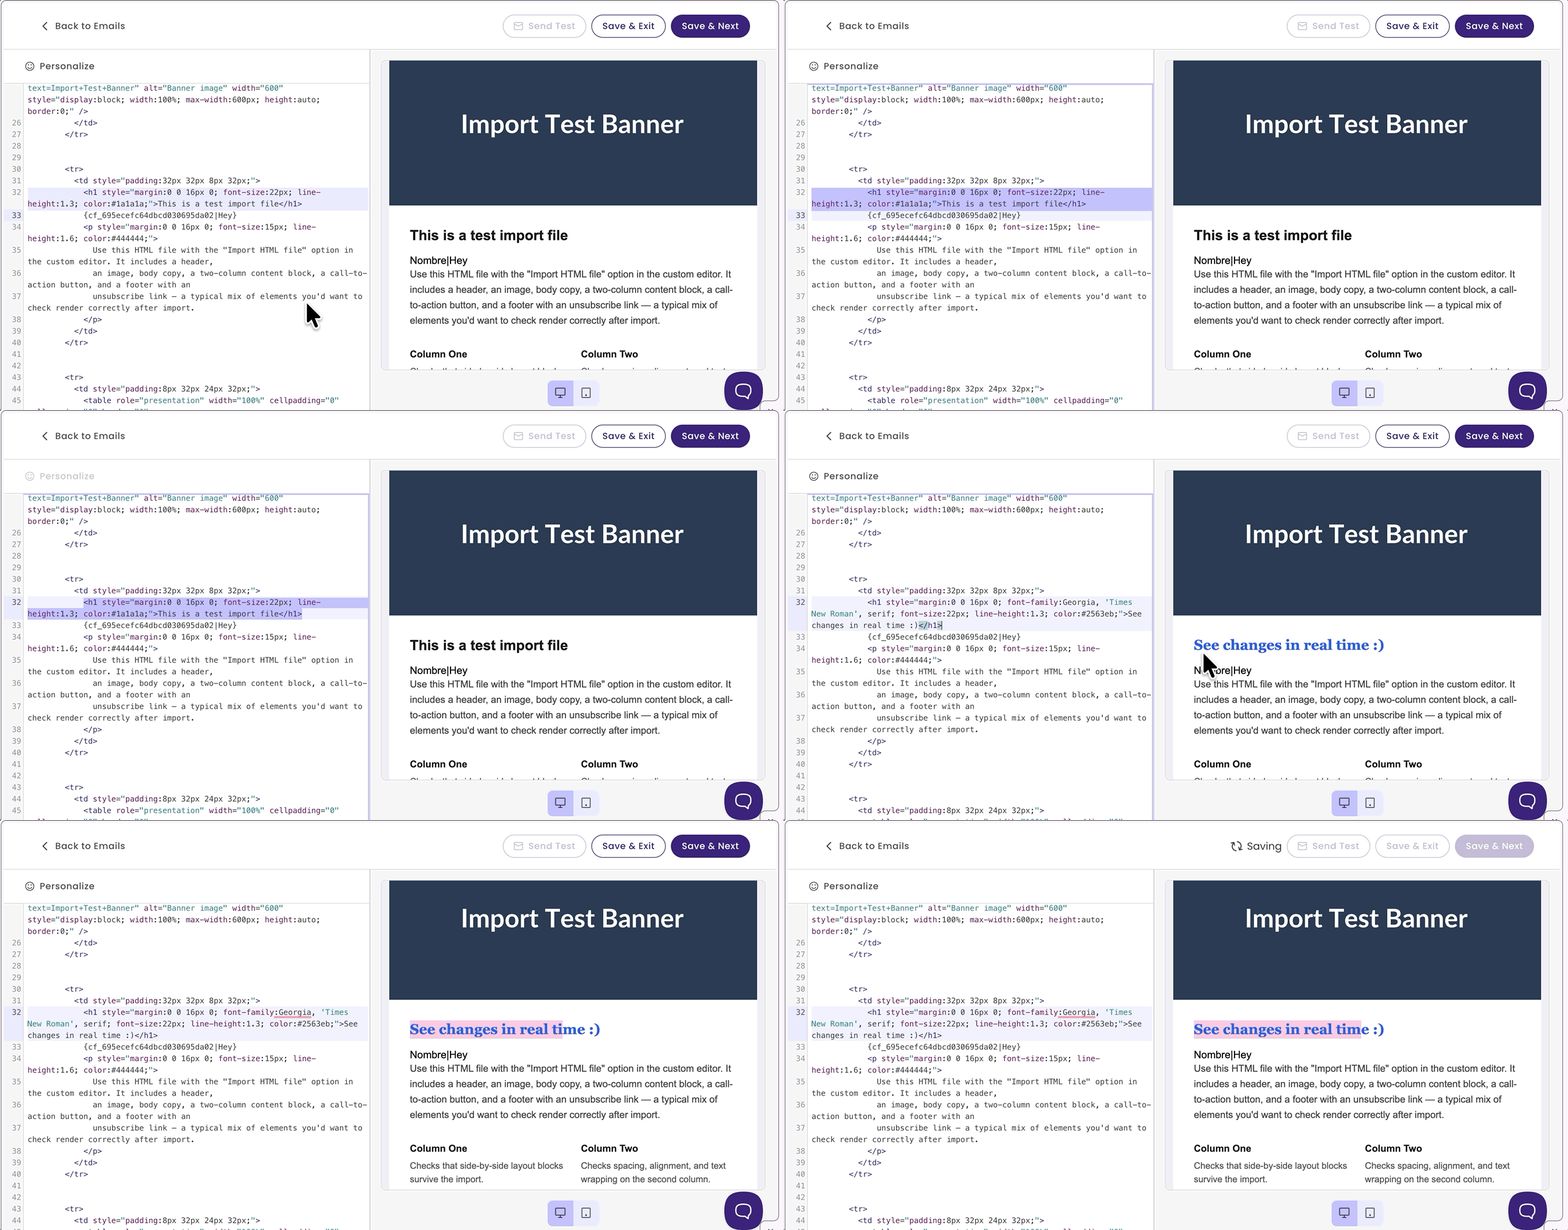
- In the left panel, edit your HTML code.
-
Check the right panel as you type — it updates immediately to show how your email will look.
-
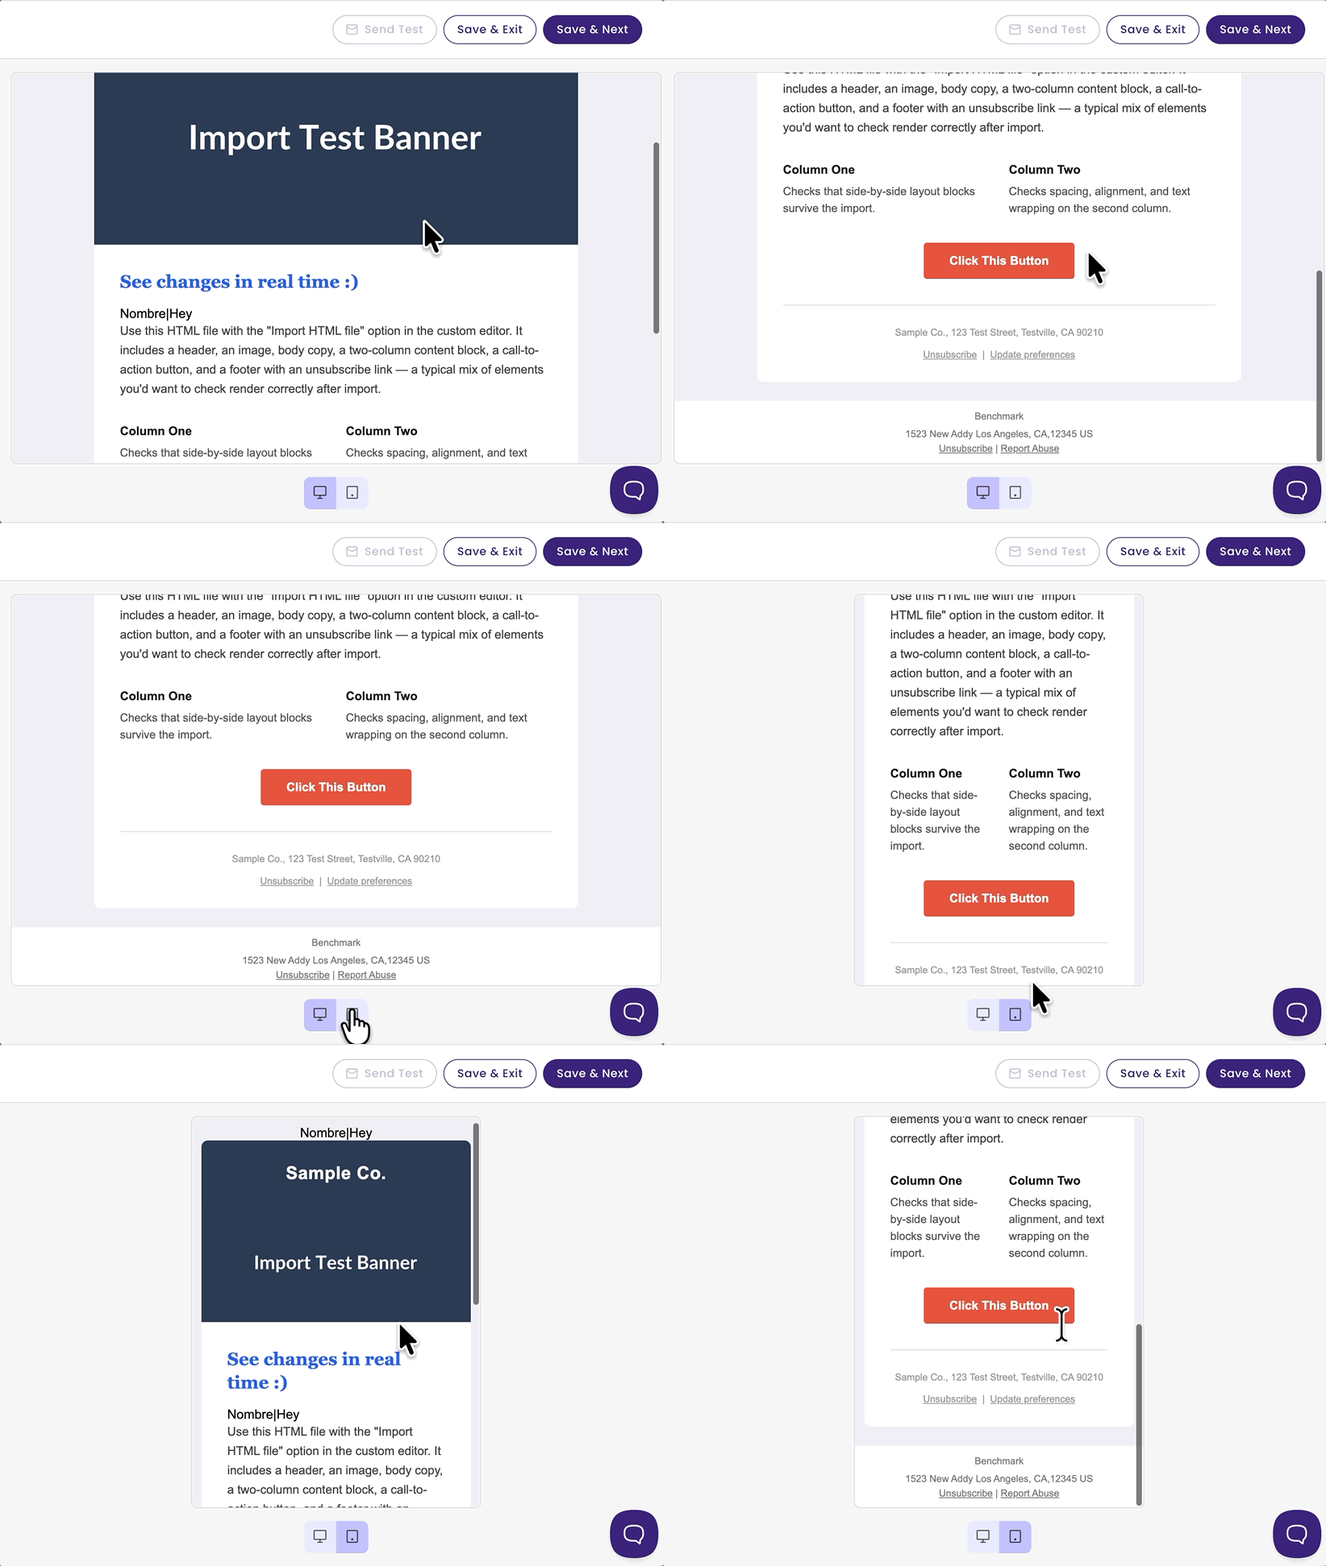
Send yourself a Test email or toggle between the Desktop and Mobile options to see how your emails would appear on a desktop or on a mobile device.
- When done, select Save & Exit to finish later or Save & Next to schedule or send your email immediately.
- When ready to send, complete the email checklist.
- Subject: Add something catchy.
- Preview text (optional)
- From: Add your sender information
- For optimal email delivery, we encourage adding a private domain.
- To: Select the contacts you will be emailing.
- To learn how to add contacts, click here.
- When ready to send, complete the email checklist.
After sending your email, you can find the reports in the Email Reports page.
Frequently Asked Questions
Do I need to know how to code to use this editor?
Some HTML knowledge helps, since you're editing raw markup. If you'd rather build visually without touching code, use the drag-and-drop email editor instead.
Can I remove the email footer?
No. The footer keeps your emails compliant with CAN-SPAM and other anti-spam regulations, so it's added automatically and can't be turned off. It uses the same footer settings as the drag-and-drop editor.
Can I personalize my email with contact fields?
Yes, you can personalize using the Personalize menu in the editor.
Personalize with Merge Tags
- Click in the area where you want to add a contact field.
-
Click Personalize in the editor and select a merge tag to insert, such as First Name.
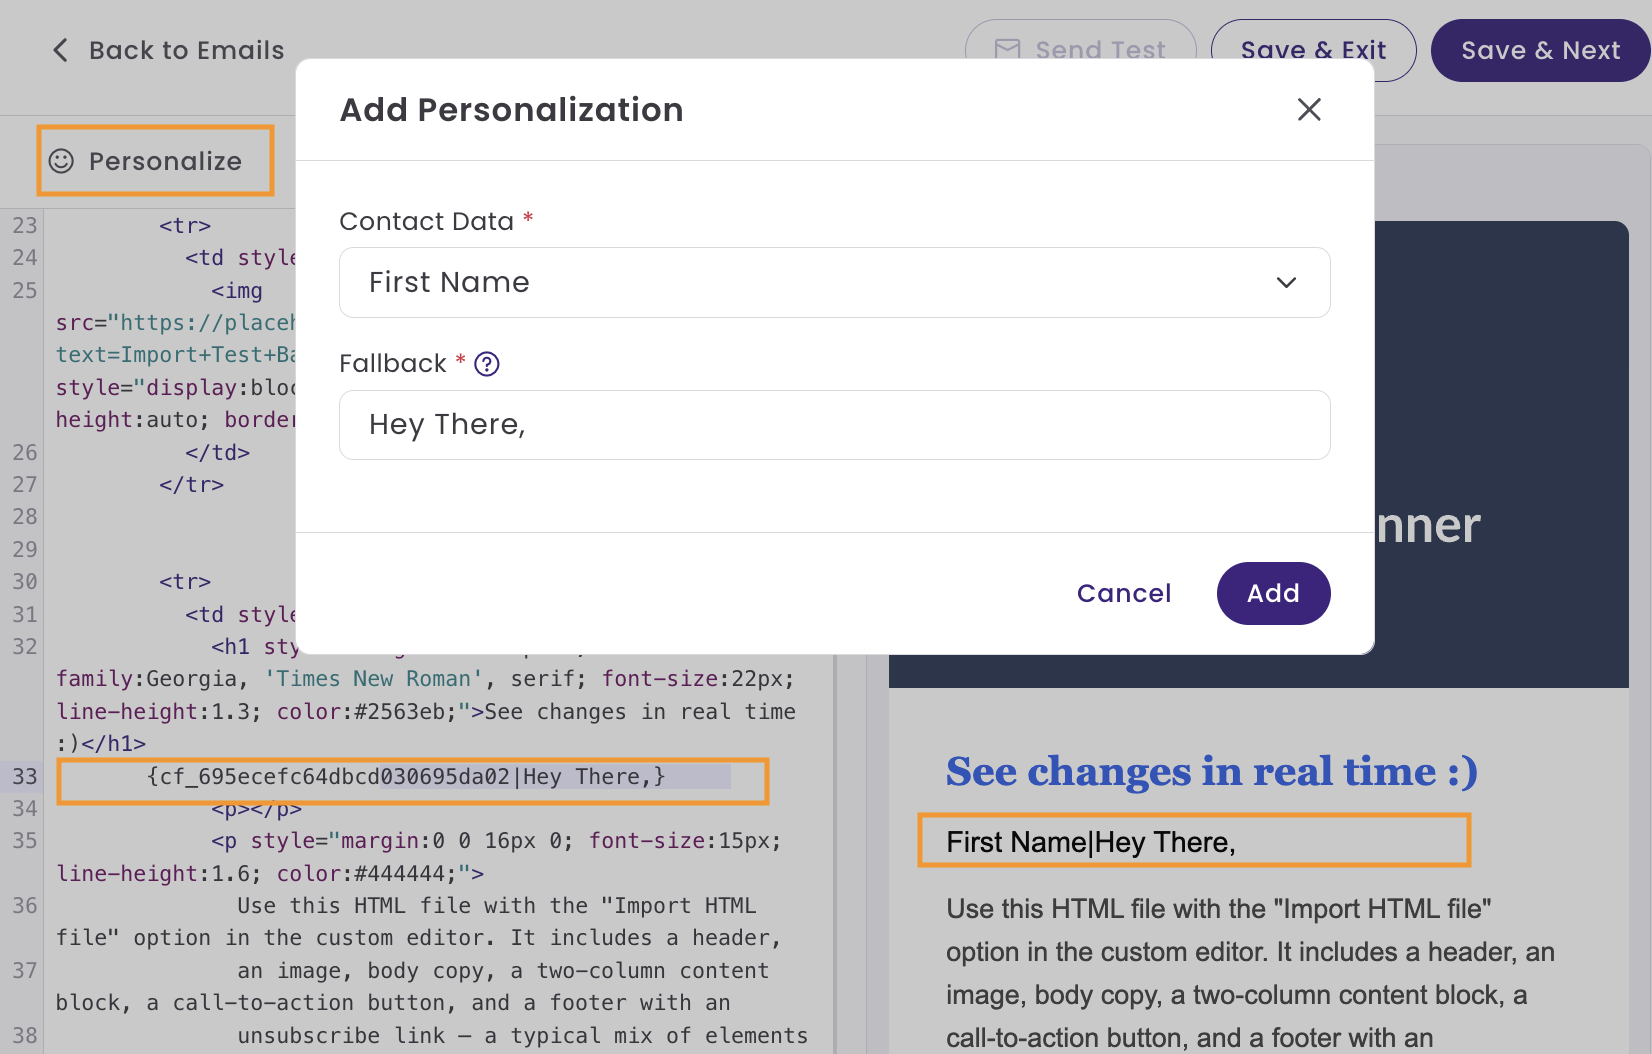
Tip: You can also copy merge tag syntax directly from Contact Fields in Settings and paste it into your HTML.
My uploaded HTML doesn't look right in the preview. What should I check?
Look for unclosed tags, missing inline styles, or CSS the editor doesn't support (some email clients block external stylesheets and certain CSS properties). If it still doesn't render as expected, contact Benchmark Email support.
Why should I send a test email before sending my campaign?
Custom code can render differently across email clients than it does in the live preview. Sending a test lets you check your email in an actual inbox before it goes to your full list.