Upload, Edit, and Manage Images
Whether you have your own images to upload or need to add images, you can find these options in the email editor.
Topics Covered In This Article
BEFORE GETTING STARTED
Supported image formats include:
- .jpg, .jpeg, .png, .gif, and .webp
- Images must not exceed 10 MB per file.
- Images wider than 1200 pixels will be resized to 1200 pixels.
Images cannot be added to a text block. Images can only be added to the email template using an image block.
Some images are automatically resized to fit your email body and columns. The default email width is 500px, but it can be increased up to 900px depending on your template.

Uploads
The Uploads folder is your personal image library, where you can upload new images and access previously uploaded, stock, and AI-generated images.
To upload images to your email or account, start in the email builder.
- Open a new or existing email.
- If starting from a new email, you'll be taken to the Edit Design step.
- If selecting an existing email, select Edit Design.
- Click on Uploads from the left menu.
- Drag an image from your computer or click Upload Image.
- Once the image is uploaded, click it and drag it into your email template.
-
See example:
-
- Once the image is uploaded, click it and drag it into your email template.

Once the image is uploaded, click it and drag it into your email template.
Stock Images
The Images feature offers stock images and lets you create custom images using the built-in AI tool.
Use Stock Images
- In the email builder, click Images in the left menu.
-
In the search bar, add a prompt for the type of image you need. For example, type "coffee time" and hit enter.
- Select an image by clicking and dragging it to the email builder.

Once the image is added to the email, it will also be saved to your Uploads folder.
Edit Images
Edit images inside the email builder without needing external design software.
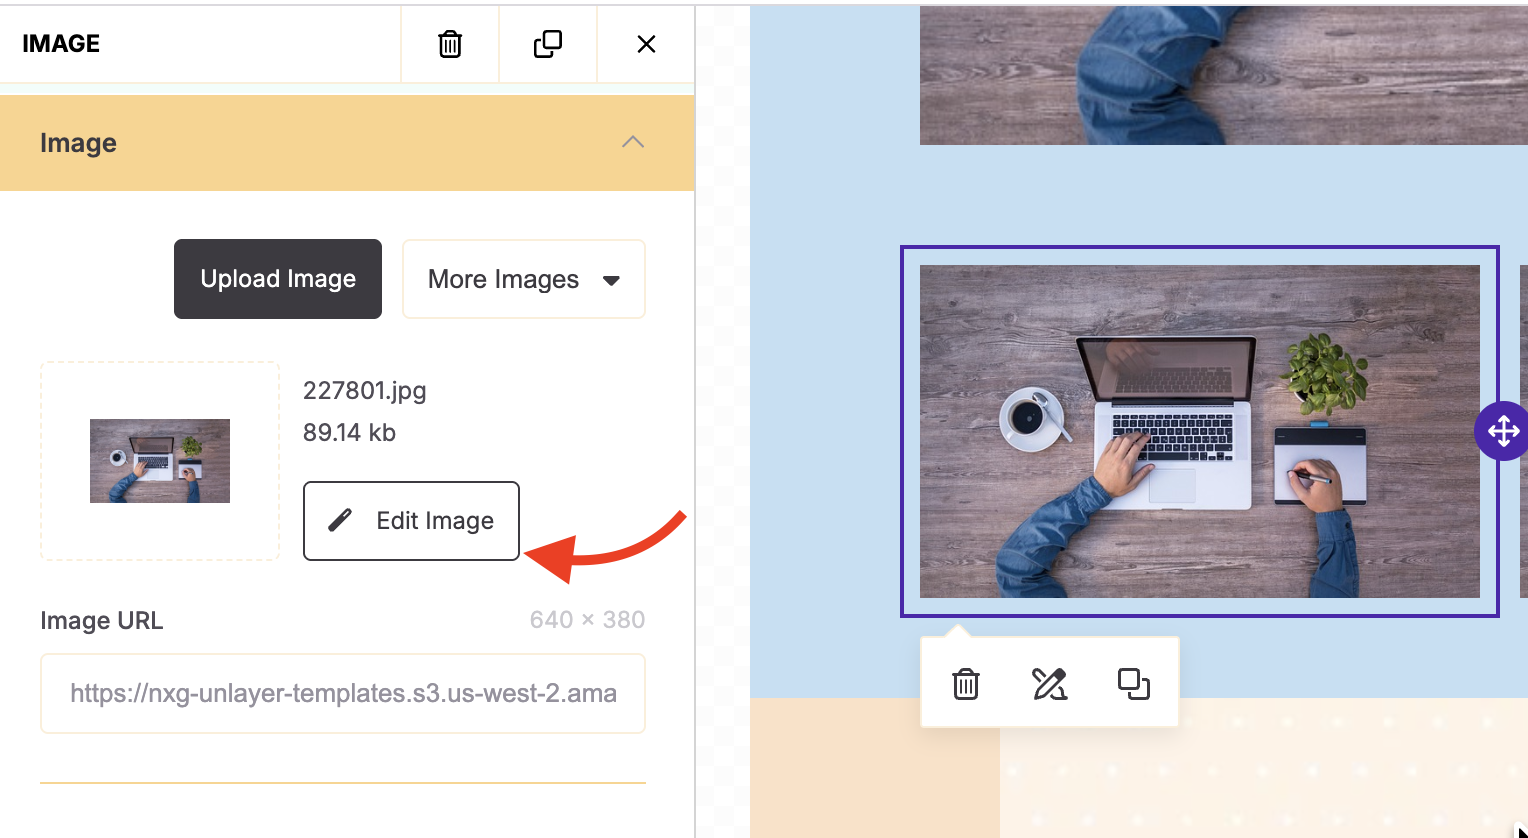
- Open an existing email.
- Click on the image you want to edit.
-
Select Edit Image from the left menu.
-
Use the available editing tools to make changes such as:
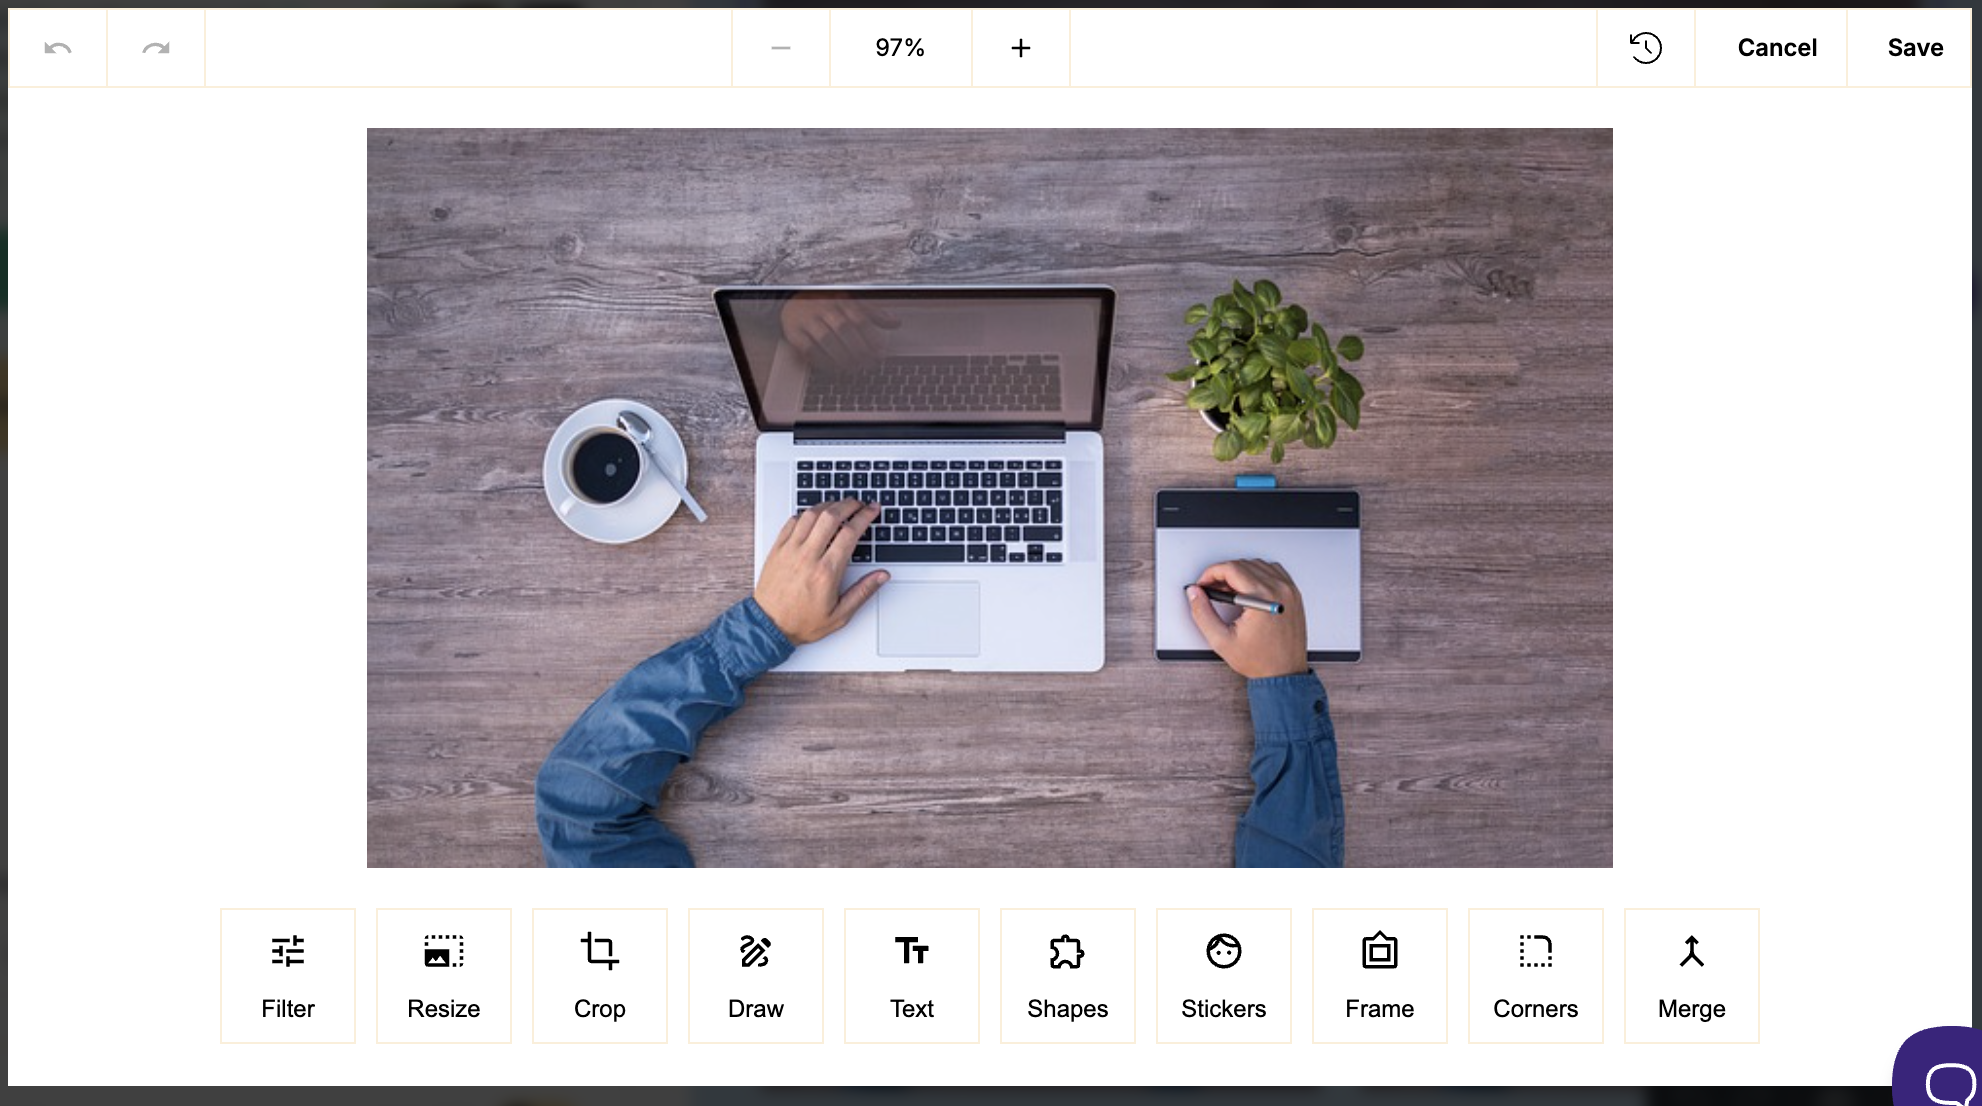


- Click Save when finished.
Your updated image will automatically replace the original image in the email, and a copy will be saved to your Uploads folder.
Delete Images
Deleting images cannot be reversed. A deleted image will not disappear from a previously sent email.
To delete an image, please click the Uploads folder, hover over the image you want to remove, then click the three dots and select Delete.

Email Images Best Practices
Adjustable body width: The default email body is 500 px wide, but you can increase it up to 900 px in the editor settings. Image sizes will scale proportionally — a full-width image always fills 100% of the body, and two equal columns will each be half the body width.

Export images at double the display size (e.g., 1000 px wide for a 500 px slot) so they appear crisp on retina and high-DPI screens.
|
500 px file |
1000 px file |
|---|---|
|
|
|
|
Blurry on retina 1× export — 500 px file
displayed at the 500 px slot
|
Sharp on all screens 2× export — 1000 px file
displayed at 500 px slot
|


Compress before uploading
Keep images under 200 KB per image. Use JPEG for photos and PNG for graphics with transparency. Large files slow load times and may trigger spam filters.
|
JPG |
PNG |
|---|---|
|
|
|
| Use JPG for photographs and rich imagery. It compresses efficiently for fast-loading emails while maintaining excellent visual quality. | Use PNG for logos & graphics. PNG preserves transparency, so logos and icons blend seamlessly with any background color — no white box around the image. |


Always add alt text
Some email clients block images by default. Descriptive alt text ensures your message is still communicated when images don't load.

Link your images
Make images clickable by adding a URL in the image settings. This increases engagement and gives subscribers a clear path to your content.

Test on mobile
Two-column layouts stack vertically on small screens. Preview on mobile before sending — what looks balanced at 500 px may look cramped at 375 px.
|
Desktop 500 px
|
Mobile 375 px
|
|---|---|
|
|
|


Maintain consistent ratios
For a clean, professional layout, use the same aspect ratio across your multi-column images; for example, keep them all 4:3 or all 1:1.
|
Inconsistent |
Consistent |
|---|---|
|
|
|

