Create Lists & Add Contacts to Your Lists
Creating and managing contact lists in Benchmark Email is essential for organizing your contacts and launching email campaigns. There are several ways to add contacts to a list and to create new contact lists. Contact lists simplify segmenting and managing your audience effectively.
Topics covered in this article:
- Create a list from the Contacts Page
- Create a list using the Contact Import option
- Create a list using Filters in the Contacts Page
- Add individual contacts to a list
- Add contacts to a list from the Contacts page
- Add contacts to a list from the Contact Import option
- Frequently Asked Questions
Things to know before getting started:
- Contact Lists are required when sending email campaigns from the email creation process.
- If you haven't created a contact list, you can choose to send the email to Custom Contacts.
- Custom Contacts sets a filter for contacts that match a specific criteria.
- Contacts in duplicate contact lists are considered unique and would only receive one email.
- There is a limit of 100 contact lists.
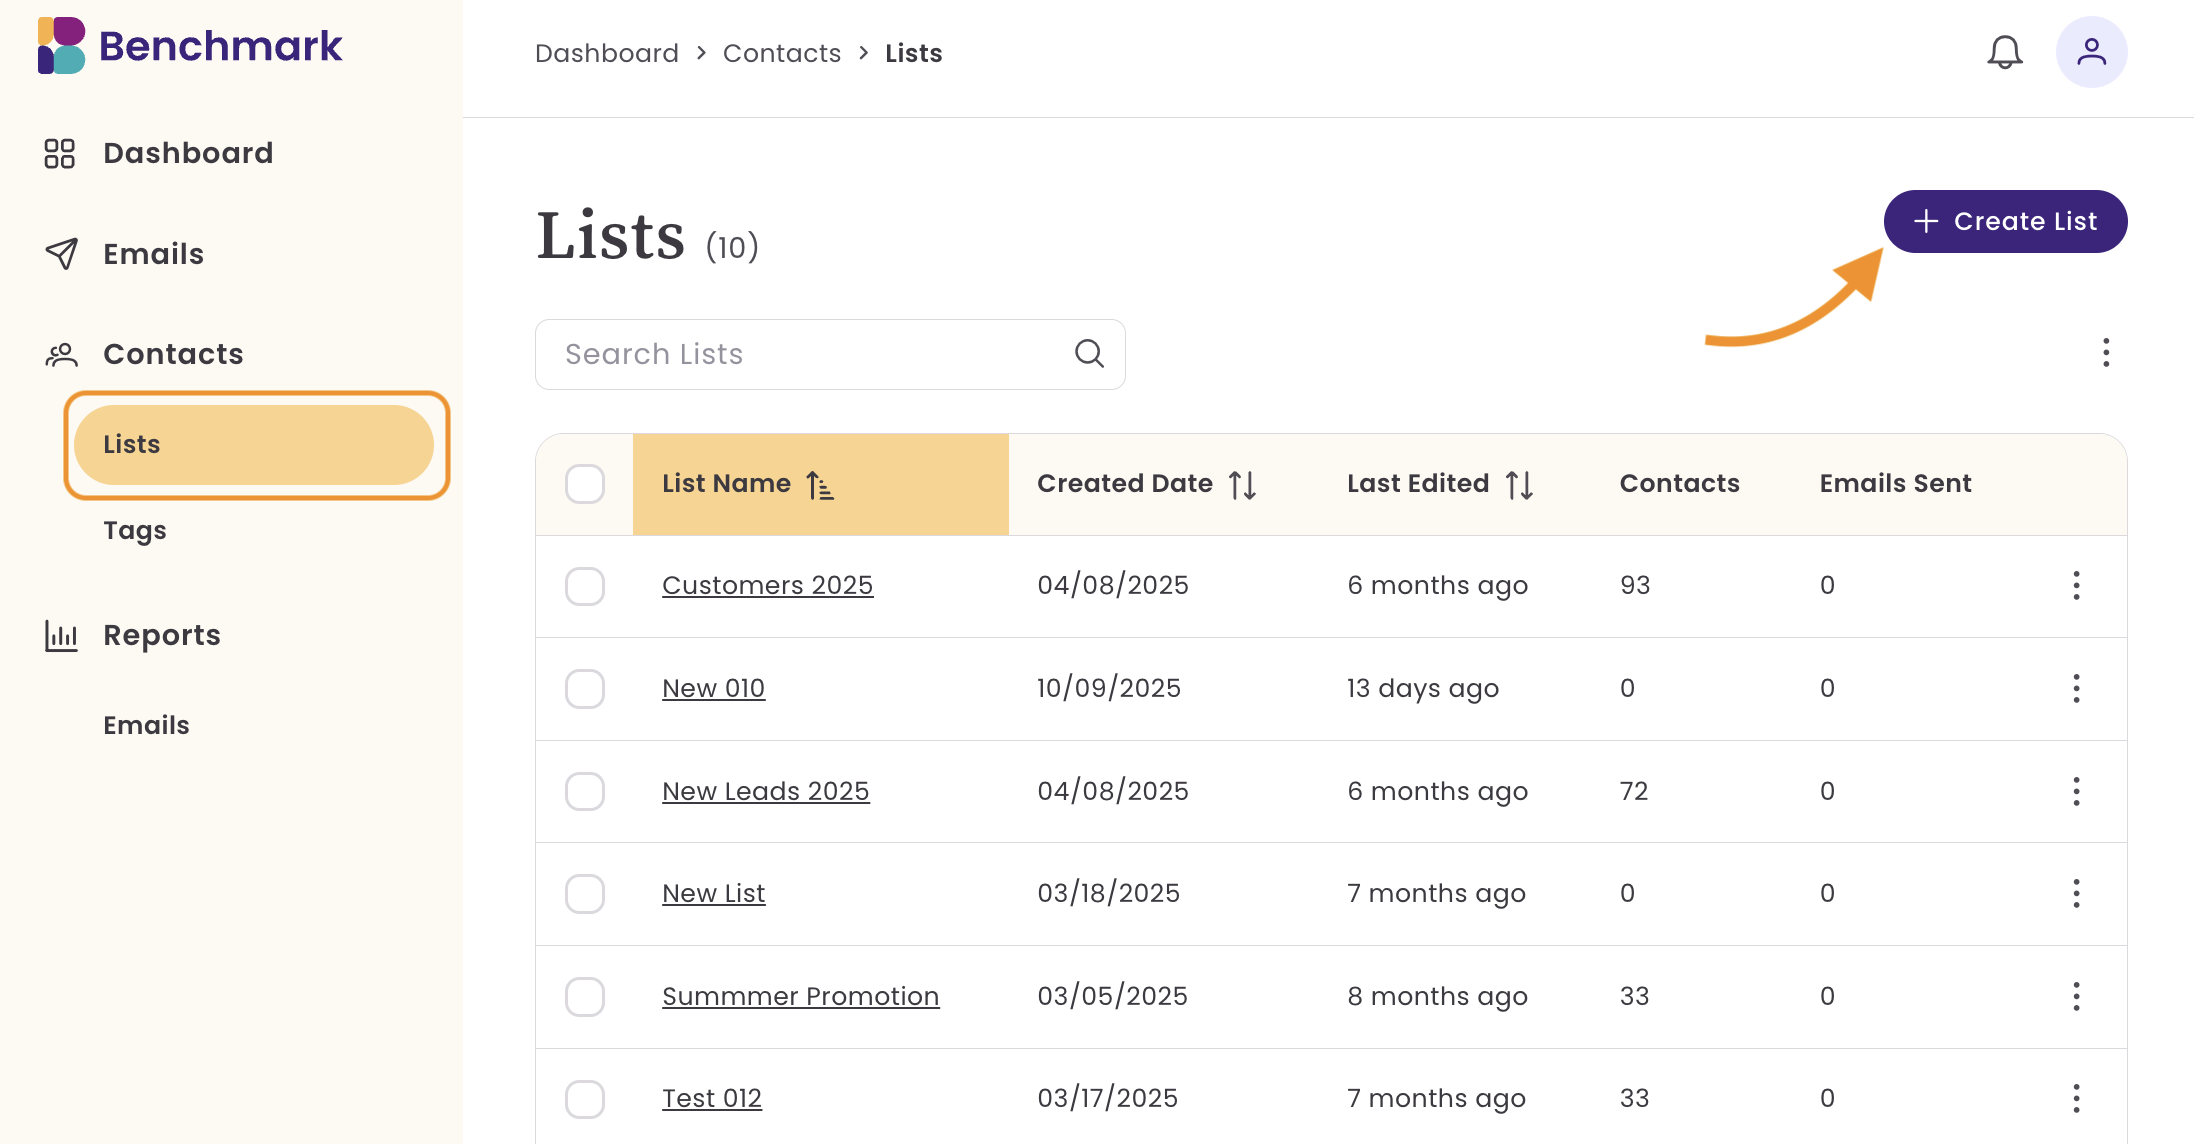
How to Create a List from the List Page
You can create new lists from the List page to easily add contacts later. To create new lists, follow the steps below from the dashboard.
- Go to the Lists page.
-
Click on Create List.
- Define your List Criteria.
- Filter for contacts who match specific criteria. Examples include:

- Tags
- Email Address
- Created Date
- Modified Date
- Custom Contact Fields
If you plan to add contacts later, select Skip Criteria.
Filter options will vary based on the field type, tag, or event.
Here is how each works.
- Field Type
- Text:
- Is Exactly
- Is Not
- Starts with
- Has any value
- Is empty
- Number
- Is
- Is Not
- Greater than
- Less than
- In between
- Has any value
- Is empty
- Date: select options from
- Is, is after, is before, is between, is in the last.
- Text:
- Tag
- Include: create a list of contacts with the tag.
- Exclude: create a list of contacts without the tag.
- Event
- Email: for this option, you can select a specific email or choose Any email and select your date range. Here are some of the filter options.
- Sent
- Not opened
- Clicked
- Not clicked
- Bounced
- Complained
- Unsubscribed
- Email: for this option, you can select a specific email or choose Any email and select your date range. Here are some of the filter options.
- The 'Or' option allows you to group other criteria options to filter for specific contacts.
-
Once you've selected your criteria, click Continue to review the filtered contacts.
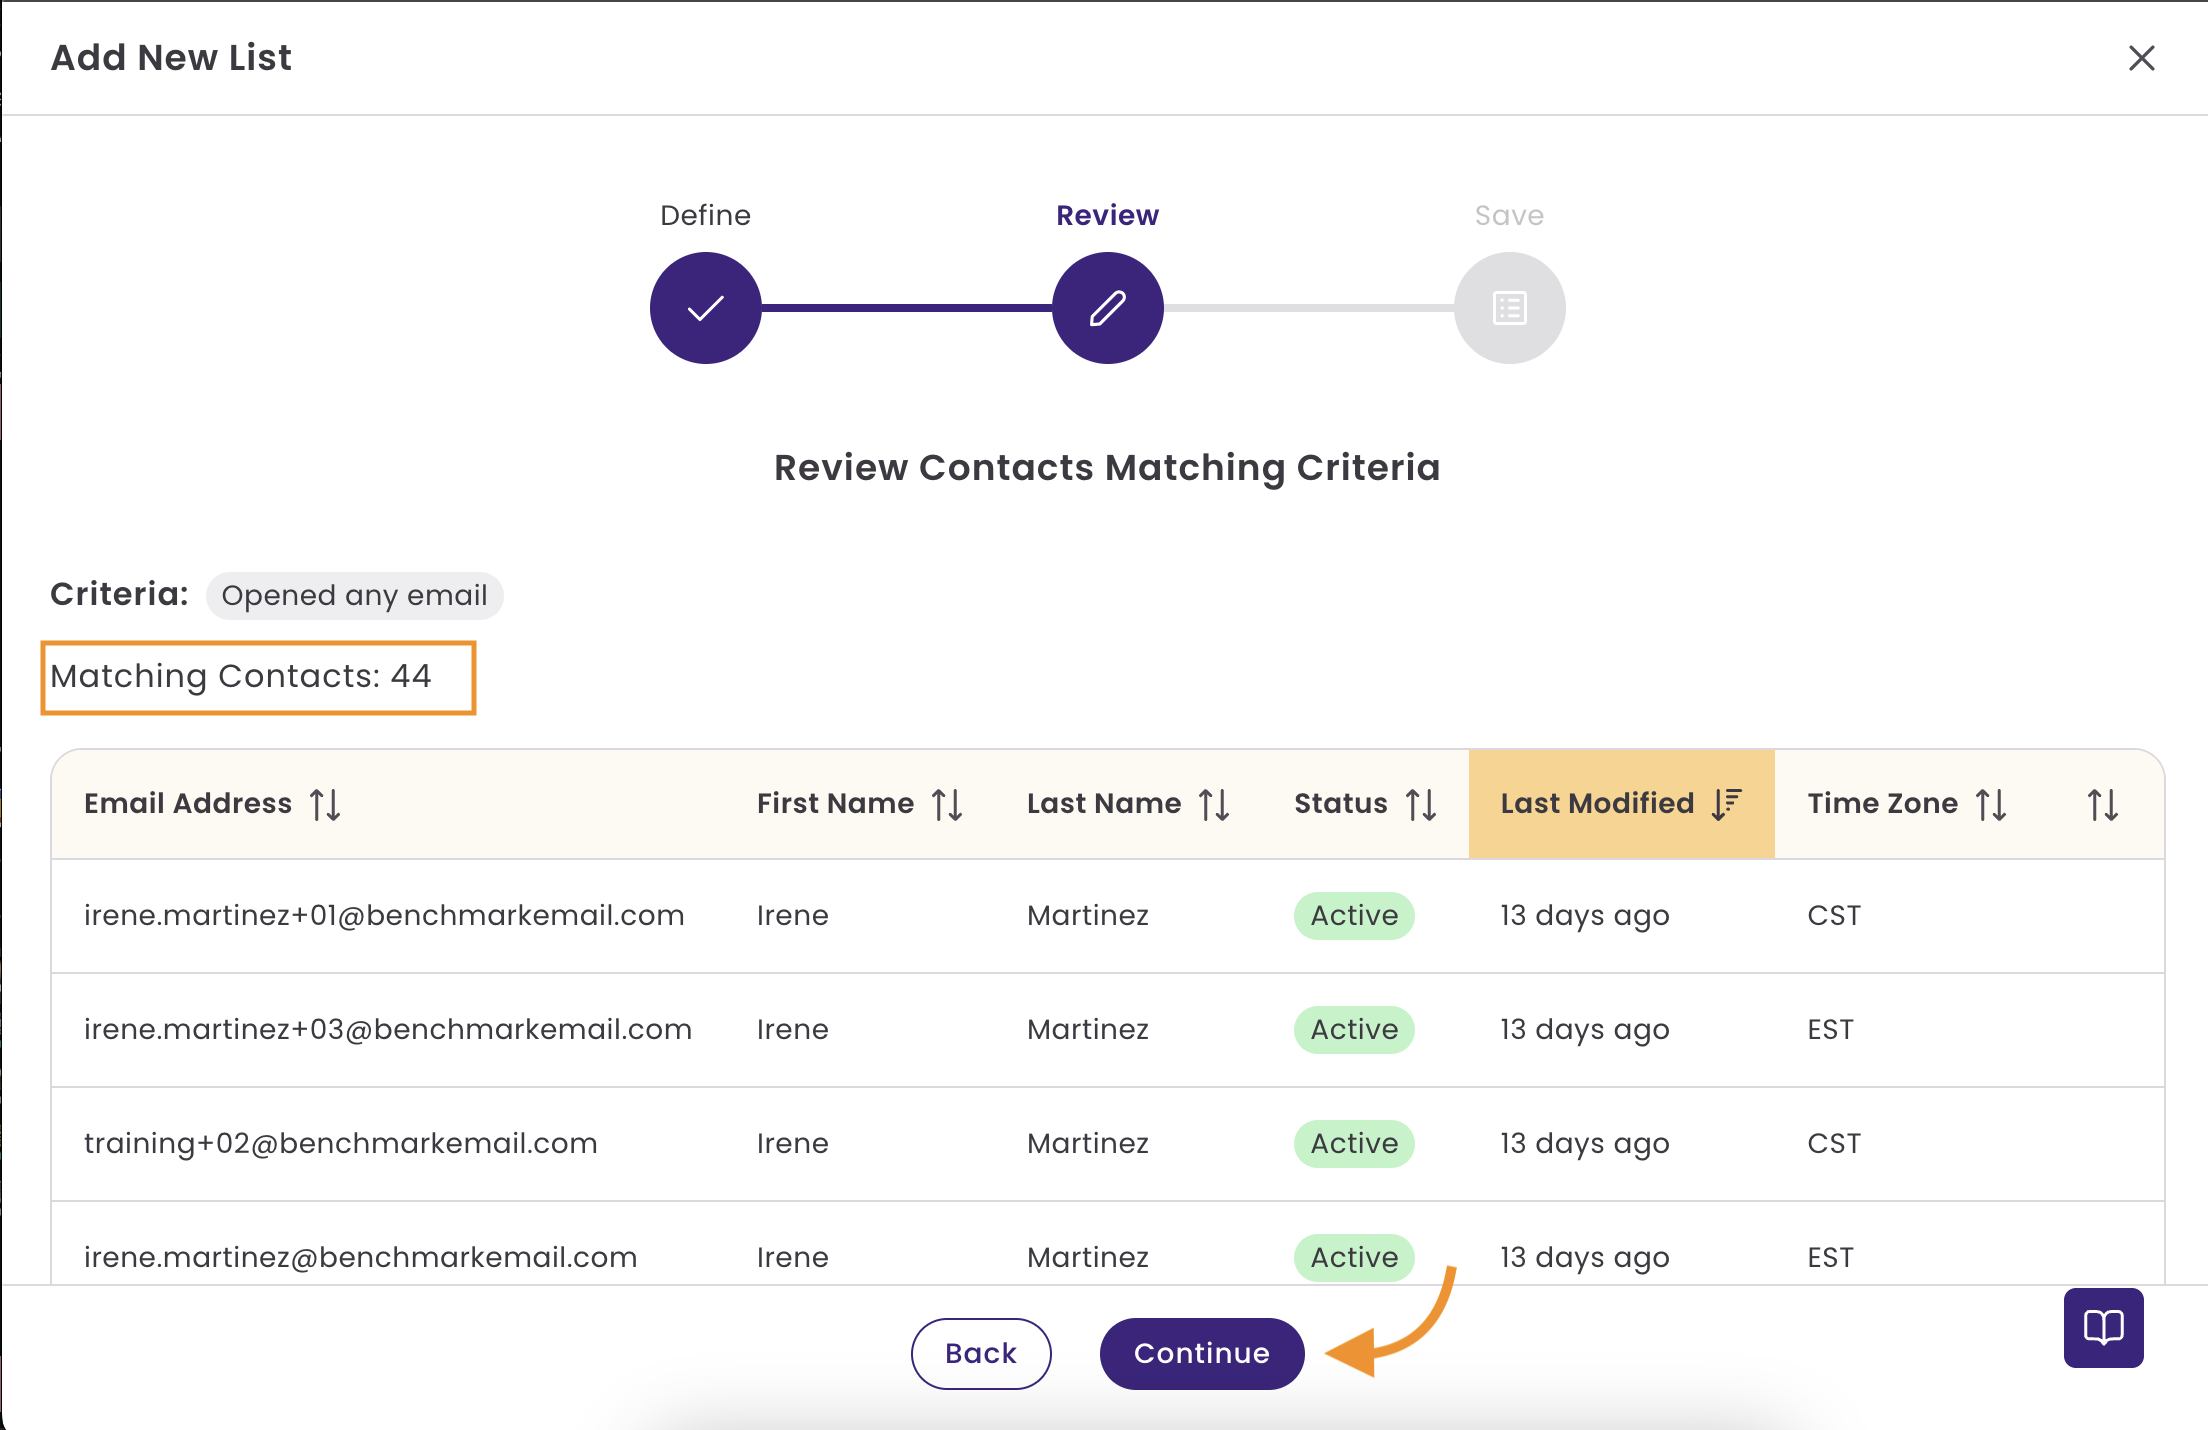
- If there are no results, go back and review the criteria.
- If the results are correct, click Continue.
-
Name the list and select Add List to finalize it.

The new list will appear in your List dashboard. Depending on the number of contacts, the list can take a few minutes to generate.

Create a list using the Contact Import option
You can also create a Contact List while importing new contacts. This method ensures that new contacts are organized immediately upon import.
To create a Contact List during import, follow the steps below.
- From the Contacts dashboard, select Import Contacts.
- Drag and drop your file or click on the Import option to select a file from your computer.
- Map the fields in your contact list, then click Continue.
-
On the next page, add the name of your new list, click +Add, and select Continue.
Note: You can select another existing list from the dropdown menu.

- Review your import summary. If everything looks good, select Continue. You'll see a success message at the top right of your screen.
Your new contacts will be added to your Contact dashboard, and the new list will appear in your List dashboard. Depending on the number of contacts, it can take a few minutes for the file to complete importing.
Create a list using Filters in the Contacts Page
To create a list using the filter options in the Contact Page, follow the steps below.
- From the Contacts page, click on the Filter option.
- Select the contact's criteria. You can include multiple criteria options using the Or and the AND options.
- When done, select Close and Apply.
- You can select the contacts by clicking on the checkbox on the top left of the menu. This will select the contacts on the first page of the results. To select all contacts matching the criteria, click Select All.
- Then click on the option + Add to Static List.
- Here, you can select an existing list or type a new list name and then click +Add.
- Last click Save.

Removing filtered contacts from a list:
Using these steps, you can also filter for contacts that should be removed from a specific list. Instead of selecting +Add to Static List, you can select the Remove From list option.
Adding Individual Contacts To a List
You can add individual contacts to a list within the contact record.
- From the Contacts page, search for your contact and click on their email address.
- Click the pencil (edit) option in the Contact Information section.
- Go down to the Static List section, click on the Dropdown Menu, and select an existing list.
- You can also create a new contact list by typing the list name and clicking +Add.

You can remove individual contacts by deselecting the list(s), clicking on the x next to the list name, or using your backspace key.

Add contacts to a list from the Contacts page
There are multiple ways to add contacts to a list from the Contacts page.
For Multiple Contacts
You can add multiple contacts from the Contacts page by selecting the checkbox in the contact view and then clicking +Add to Static List.

After selecting +Add to Static List, select an existing contact list or type a new list name, then click Save.

For a single contact
Click on just one box beside a contact from this page, and select +Add to Static List. If more contacts are needed, click on the box.

Add contacts to a list from the Contact Import option
While you are importing contacts using the Import File option, you can add contacts to an existing or new list.
See below:

Frequently Asked Questions
If I create a list based on tags, will the list auto-update?
No, you will need to run the filter periodically to ensure the contacts are added to the Static list.
Why do I need to have a list created to send an email?
During the email creation process, you can send the email to a contact list. If no list is created, you can save the email and send it to a contact or group of contacts through the Contacts page. You can also build emails from scratch using this method.
