Domain Providers That Support NS Records
To verify your domain, you'll need to add an NS (name server) record. You can find or generate it on your account's Email Settings page. Unfortunately, not all domain providers support NS records. If you cannot add an NS record to your domain, you won’t be able to send emails using our Benchmark Email NXG beta version.
Topics covered in this article:
BEFORE GETTING STARTED
Below are instructions for adding NS records with domain providers that support this option. If your provider supports NS records but isn’t listed, please email us to let us know!
Domain Records
Domain records are generated in your Benchmark account after you've added your domain and subdomain name. To learn how to add your domain, click here.
To locate your domain records, follow the steps below.
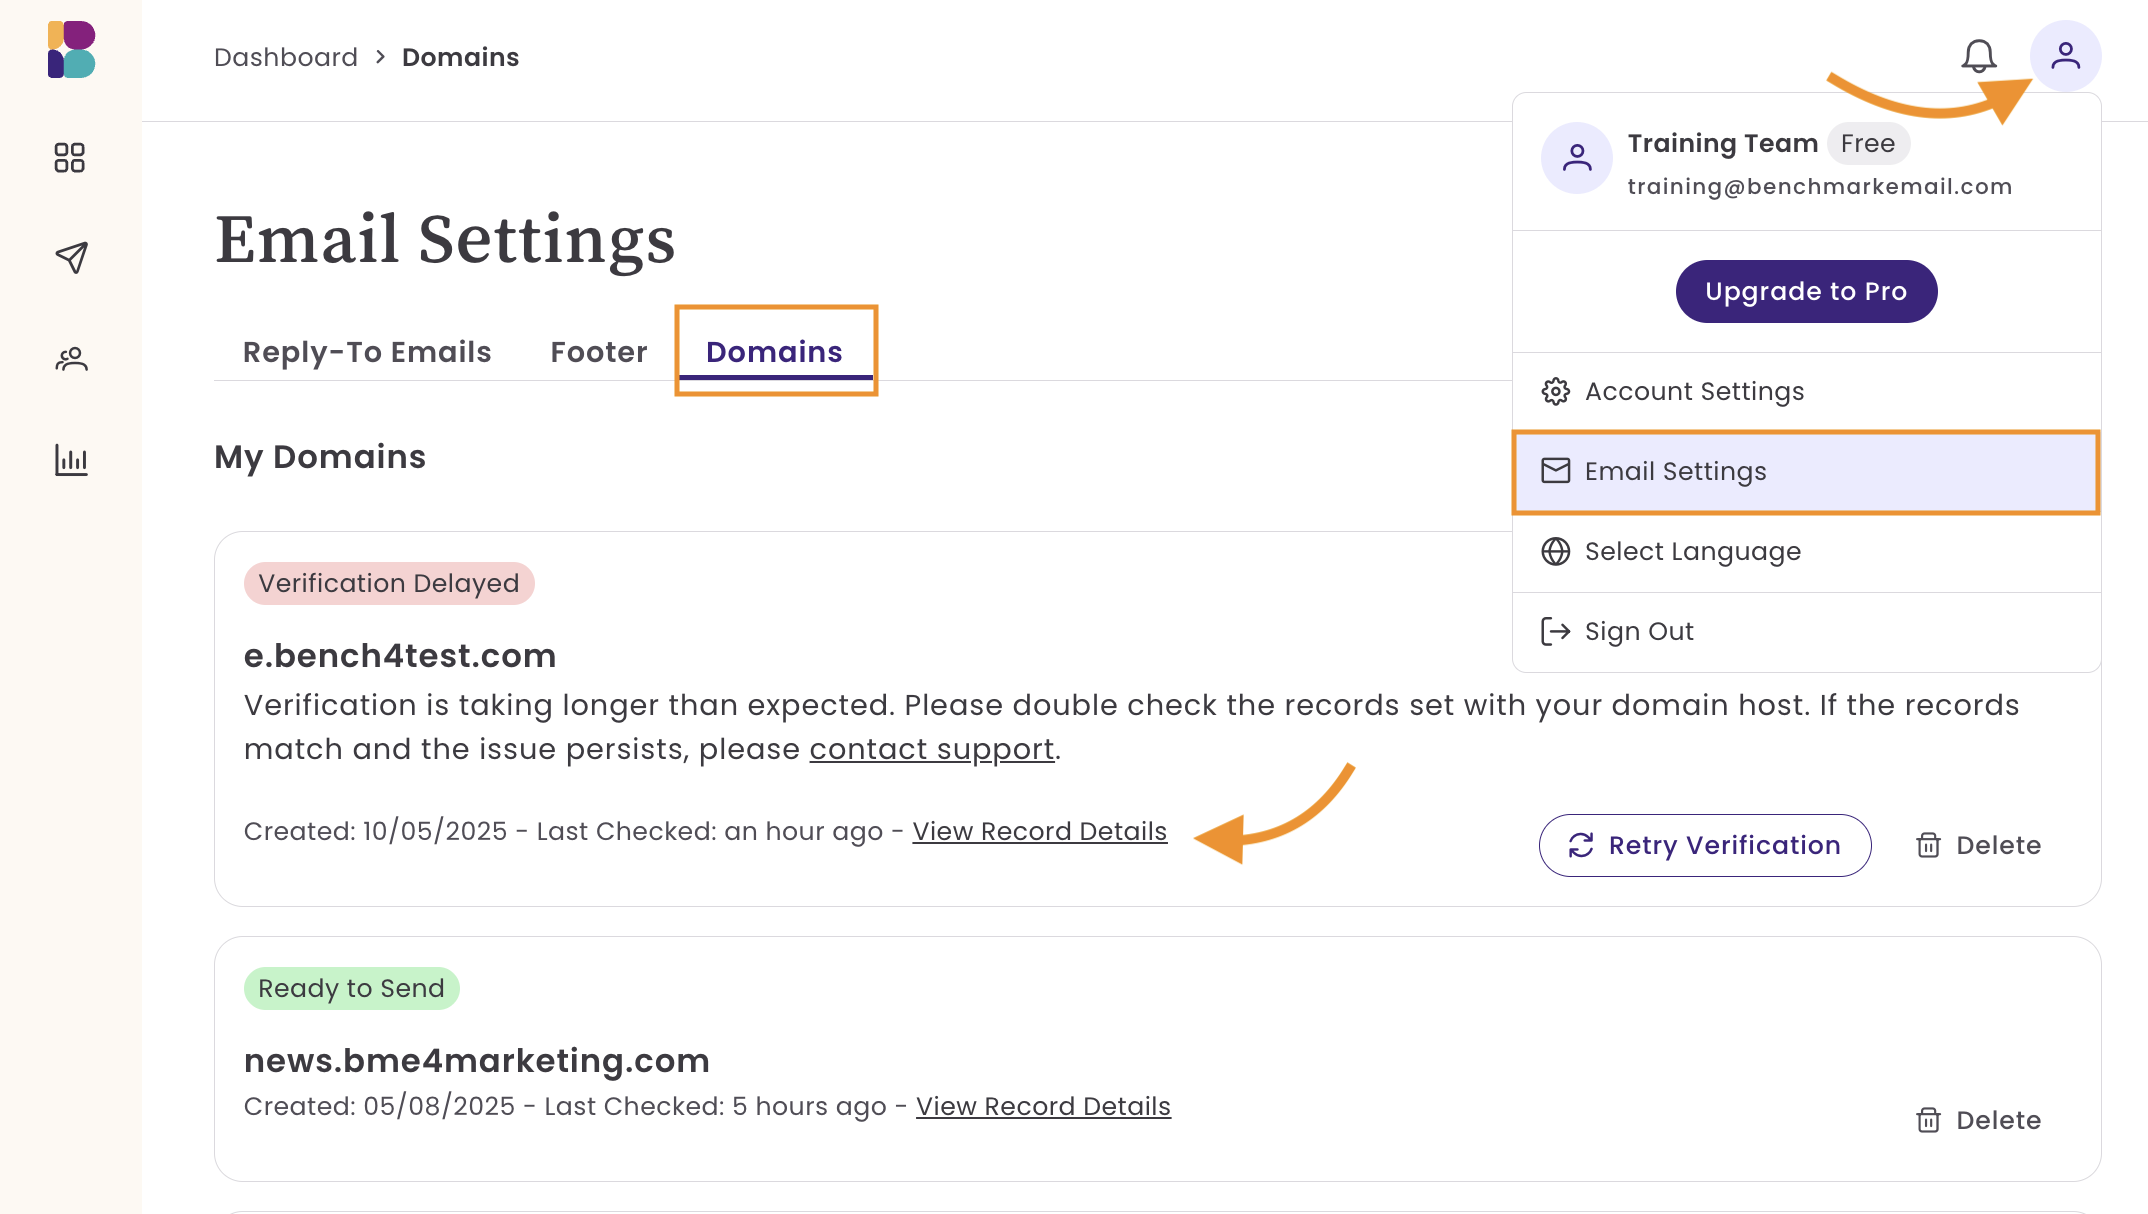
- Click on your account avatar, and select Email Settings.
-
Then select Domains from the menu option.
Here, you will see the domains you've previously added and their status.
-
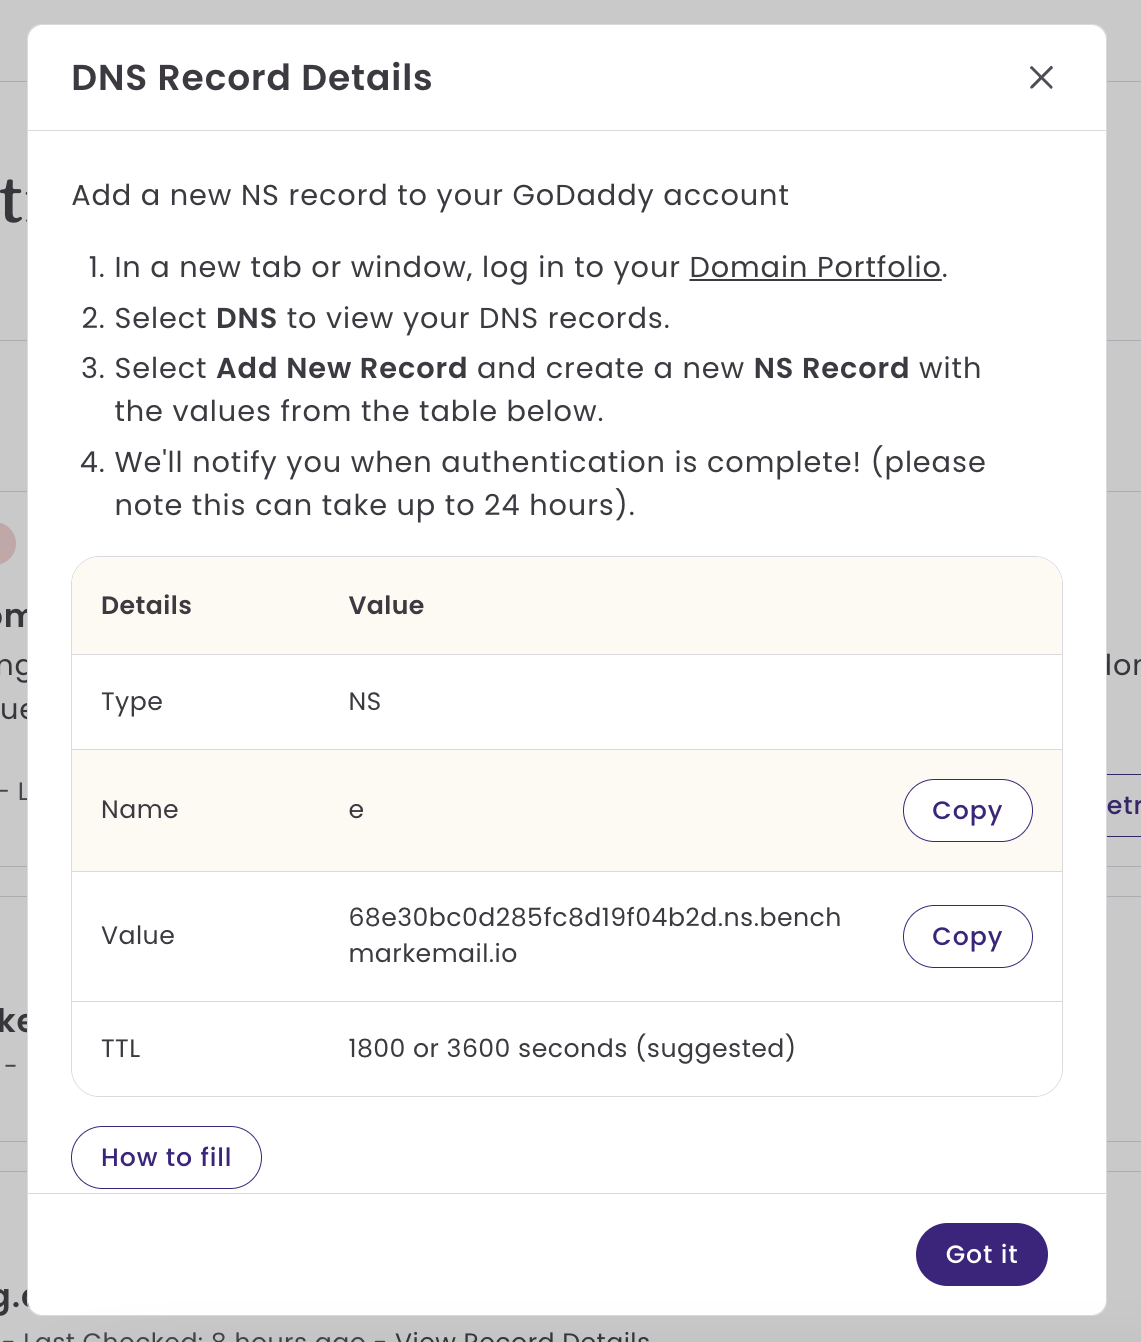
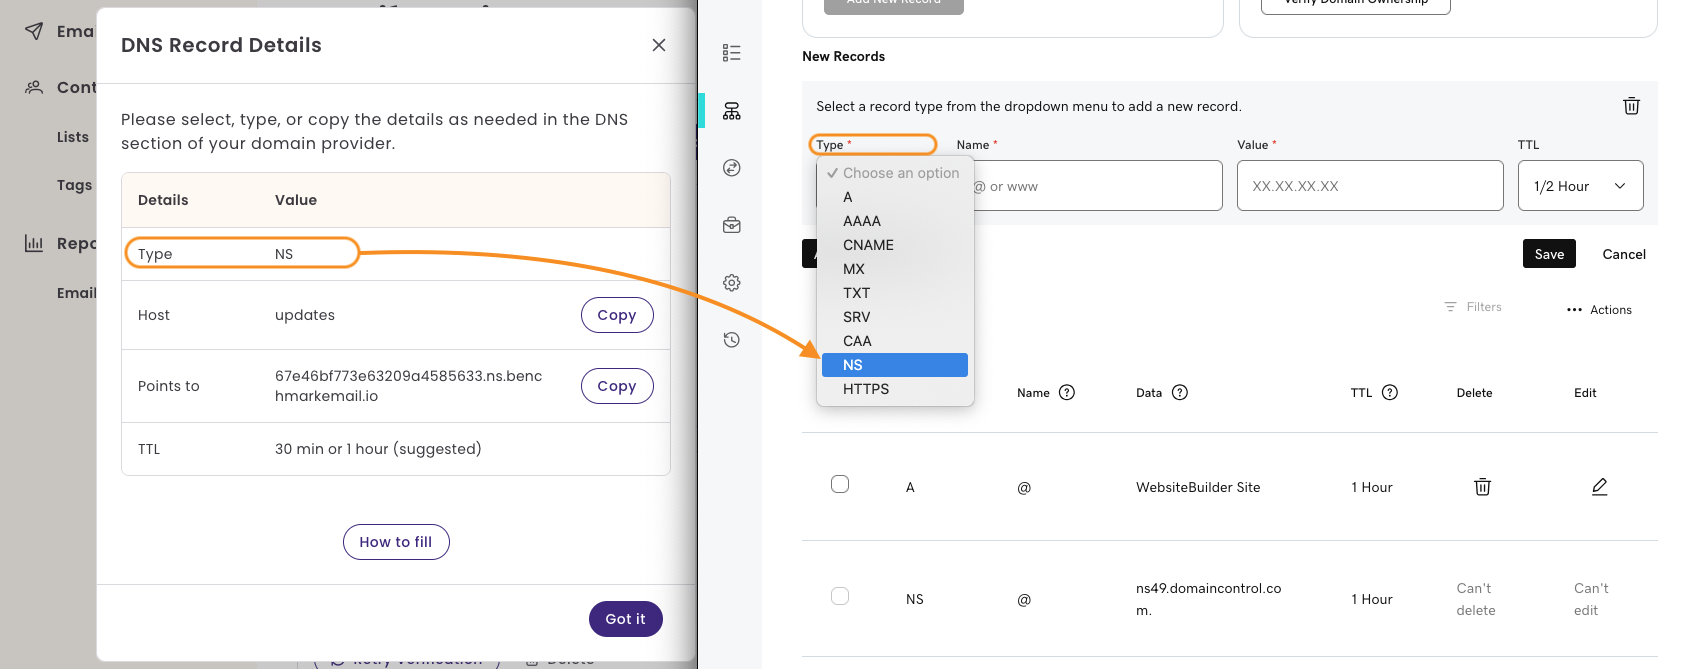
Click View Record Details to see NS Records. Next, a pop-up window will appear with your DNS Record details.
- The details provided will be used to add a new NS record in your domain's DNS settings.
- Record Type: NS (Nameserver)
- Name: your subdomain, e.g., mkt
- Value: These are generated from your account information.
-
TTL: 1800 or 3600 seconds (suggested)
- Next, log in to your domain provider. For steps on adding the records above, see the next section.


Supported Domain Providers
Select your provider to view tailored instructions.
GoDaddy
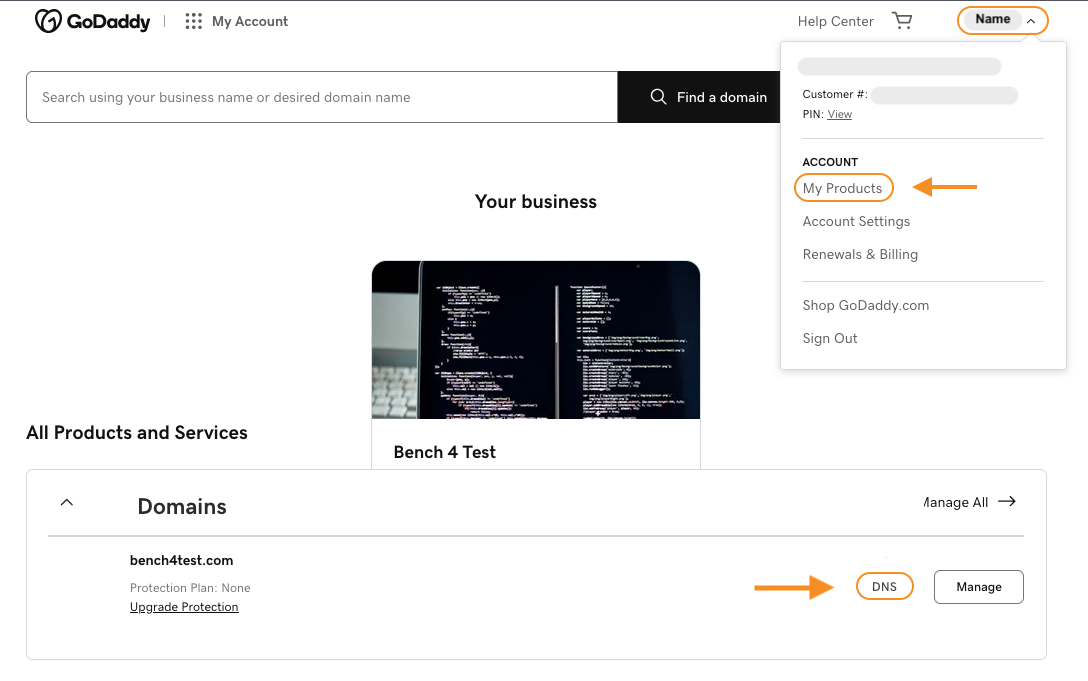
- Log in to your GoDaddy account, select My Products.
-
Scroll down to Domains, locate your domain, and click on the DNS option.
-
Select the option to Add New Record. You will need the records generated for your domain in your Benchmark NXG account.
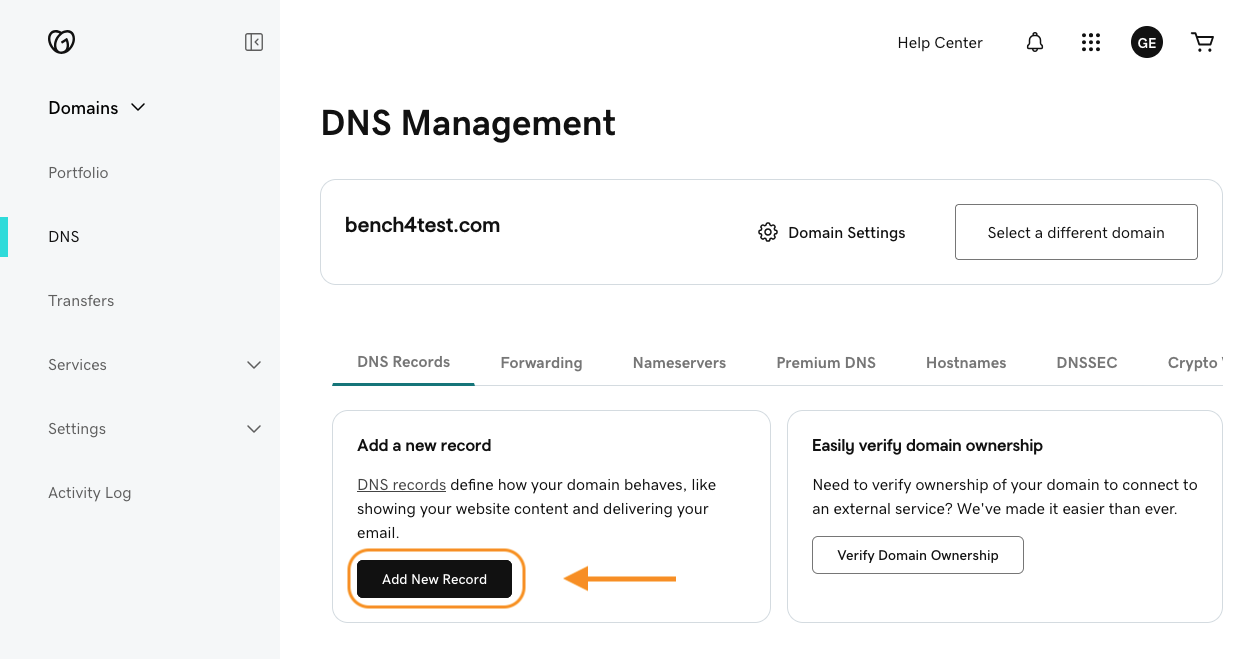
-
In the GoDaddy record field, begin by clicking on the Type option and selecting NS.
-
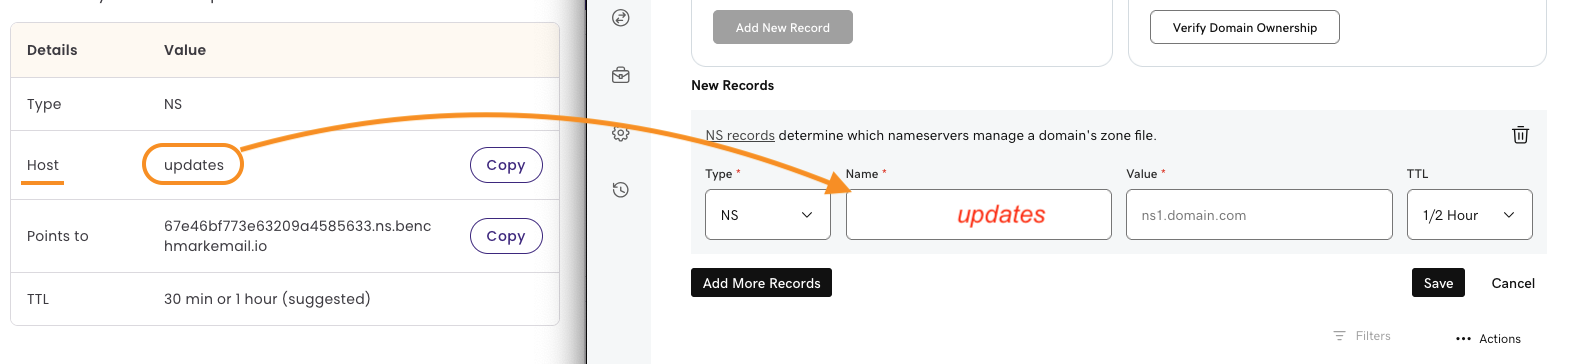
Next, copy the host value provided and paste it into the name section in the GoDaddy record field.
-
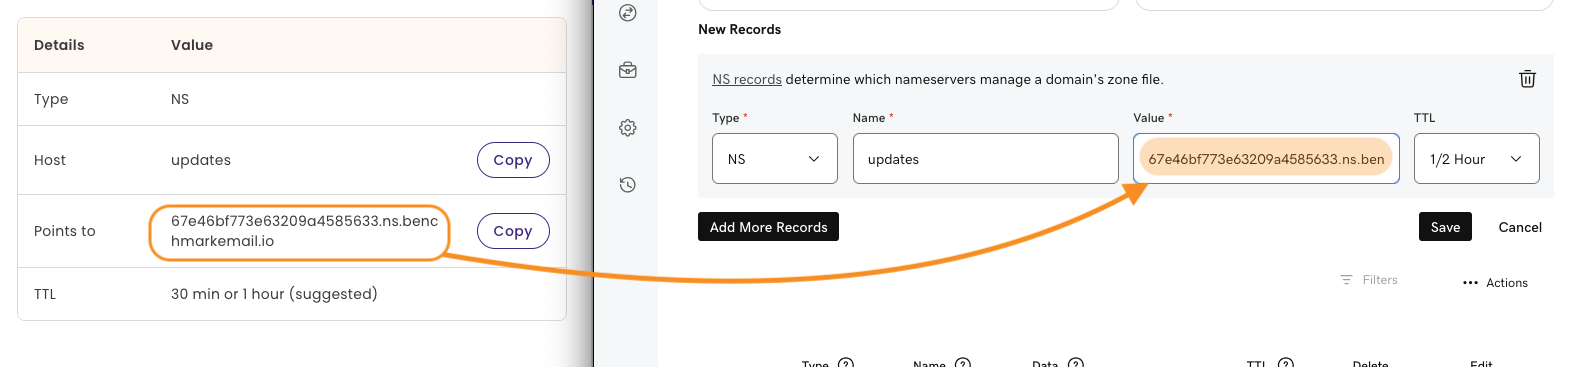
Next, copy the Points to value and enter it in the Value section in GoDaddy.
- Next, set the TTL to 30 minutes or 1 hour. If your domain host has a preset TTL, you can leave it as is.
- Last, click on the SAVE option. You will see a success message, like this: Your DNS record has been updated successfully. Most DNS updates take effect within an hour, but could take up to 48 hours to update globally.
- Back in Benchmark, you can click on Verify Domain.


After adding your NS Record, the domain status will go from Verification Pending to Verification in Progress. Please remember that most DNS updates can take up to 48 hours. Once the domain is ready to use, the status will change to Ready to Send.
Amazon Route 53
- Log in to your Amazon Route 53 account.
-
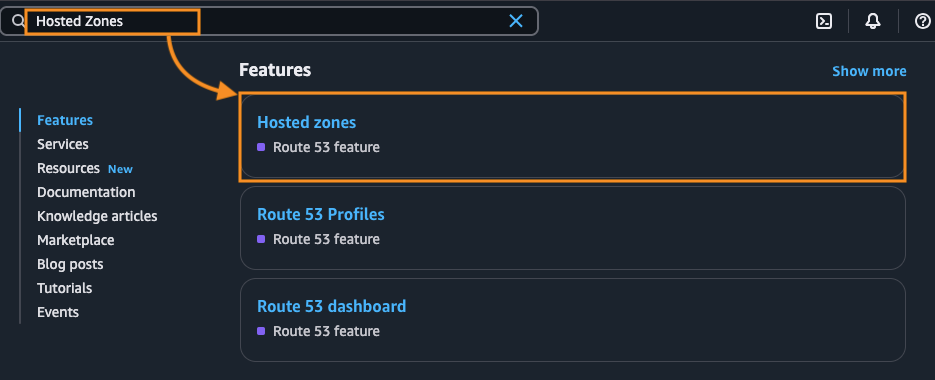
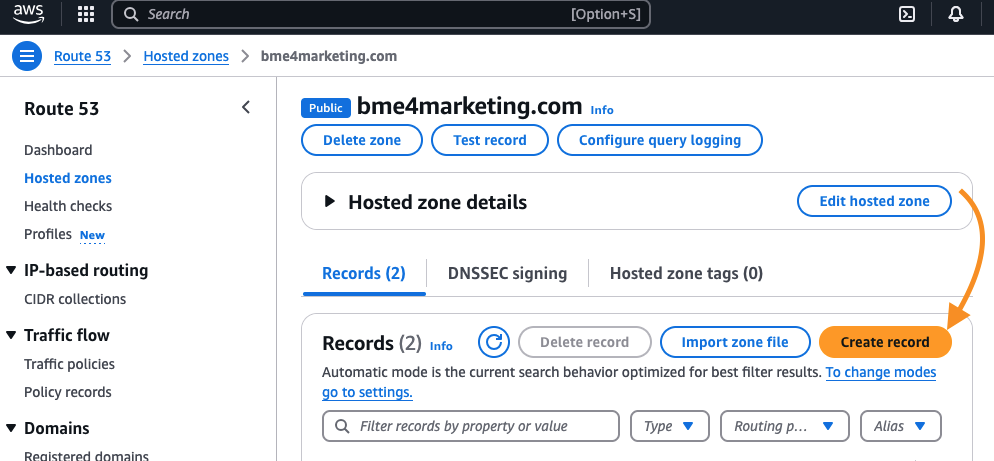
Once in your account, search for Hosted Zones and select it from the results.
- Select your domain from the Hosted Zone list. This will open the DNS Settings options.
-
Next, select Create Record.
-
Begin by adding the name to the record.
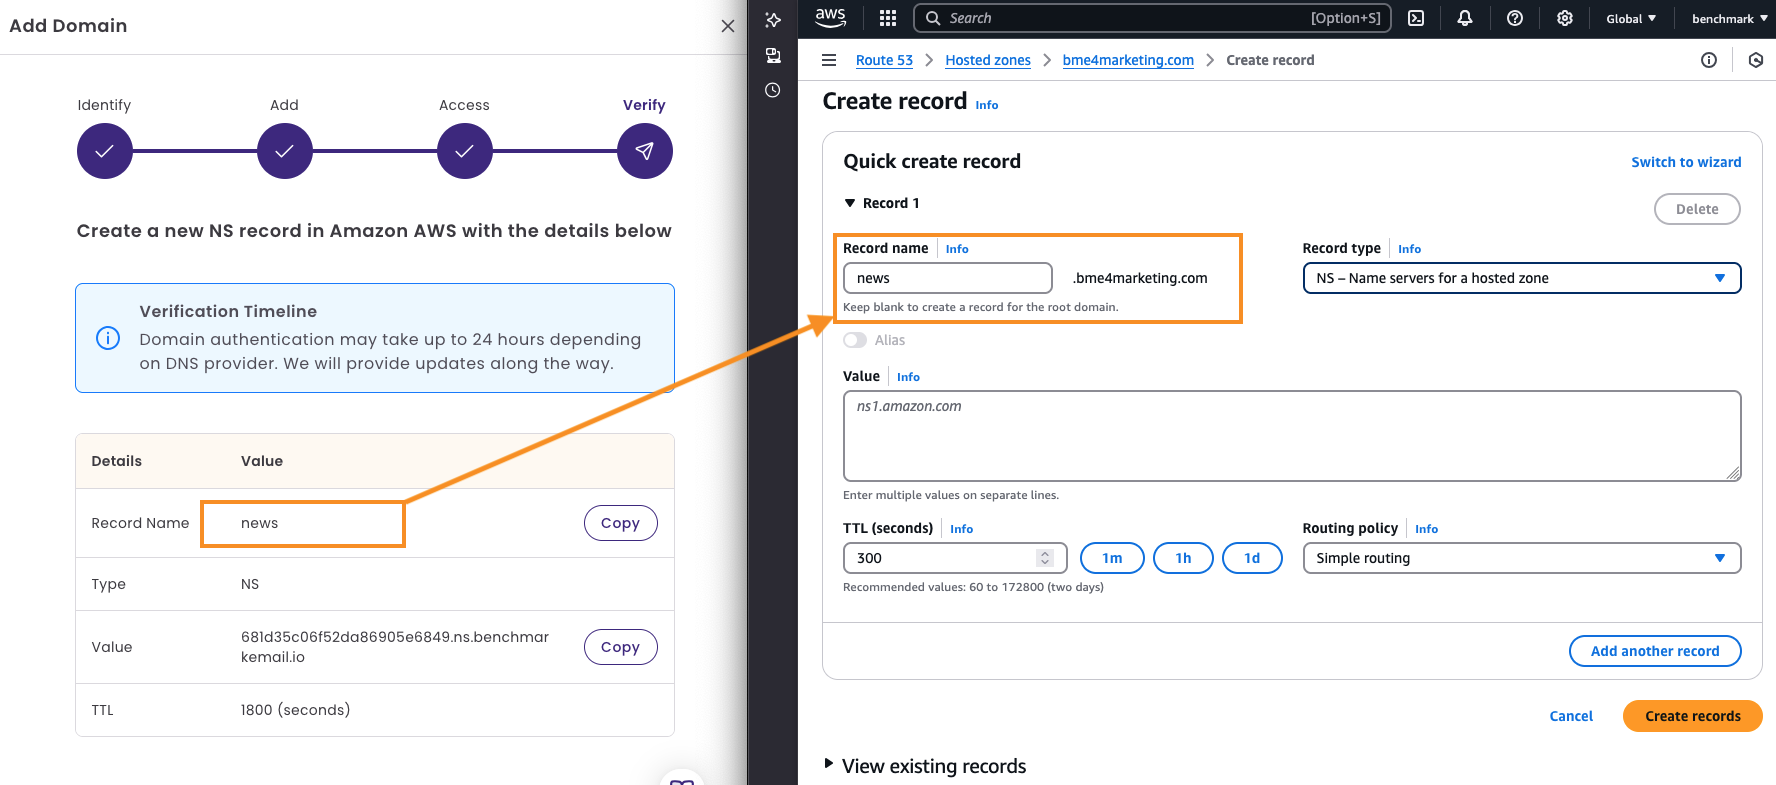
-
Next, click on Record Type and select NS (name servers).
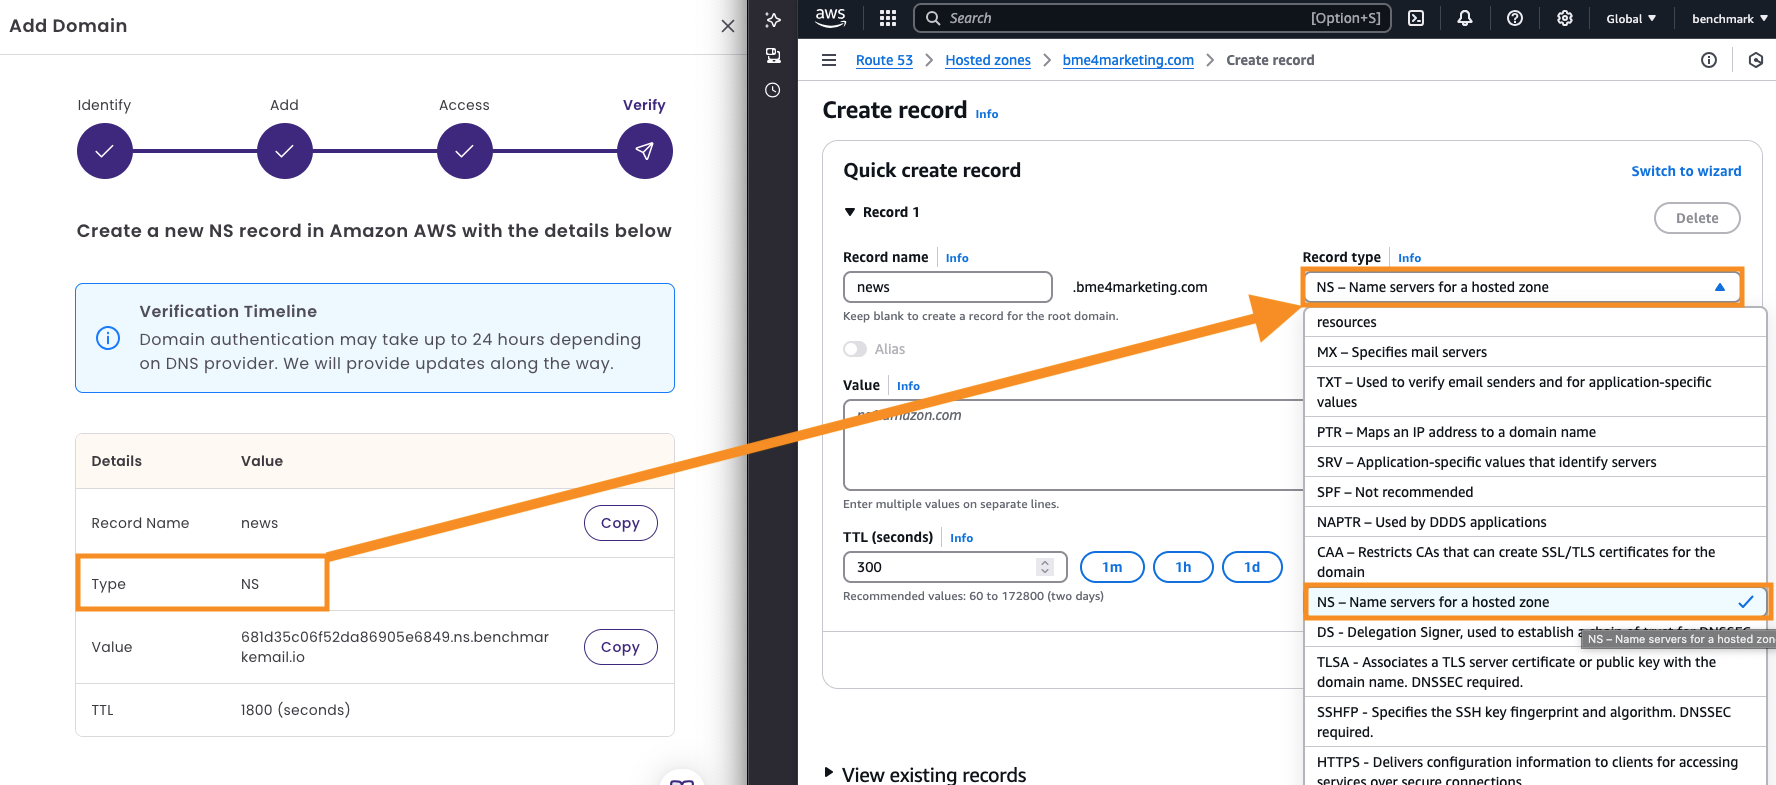
-
Next, copy the Points to value and paste it in the Value section.

- Set the TTL to 30 minutes or use the default time from AWS.
- The Routing Policy should be left as Simple Routing.
-
Last, select Create Record. You'll see a success message if the record was added correctly.
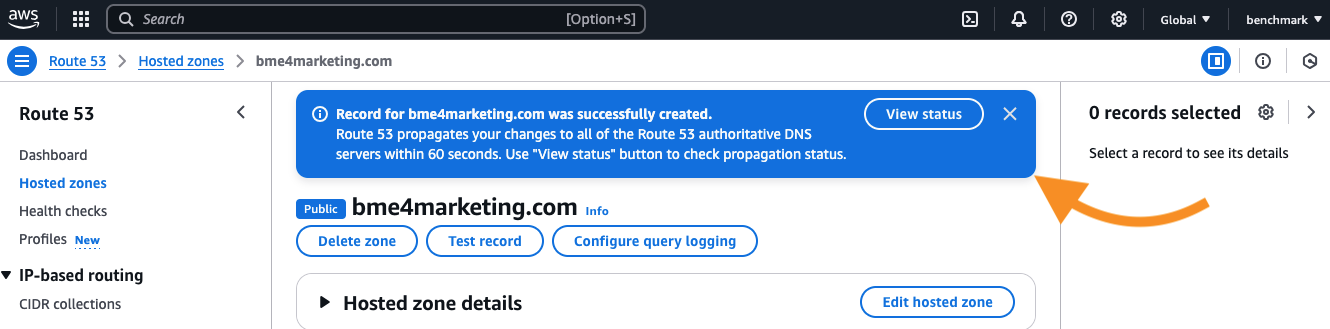
- Back in Benchmark, click on Verify Domain.


After adding your NS Record, the domain status will go from Verification Pending to Verification in Progress. Please remember that most DNS updates can take up to 48 hours. Once the domain is ready to use, the status will change to Ready to Send.
Cloudflare
- Log in to your Cloudflare account.
-
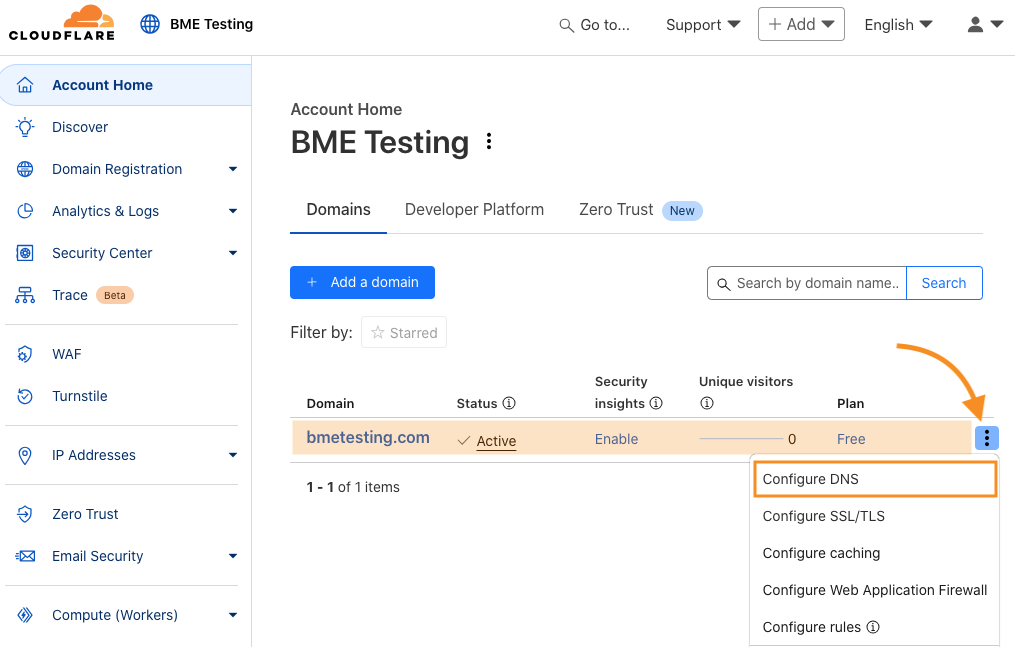
Locate your domain, click the More Options menu, and select Configure DNS.
-
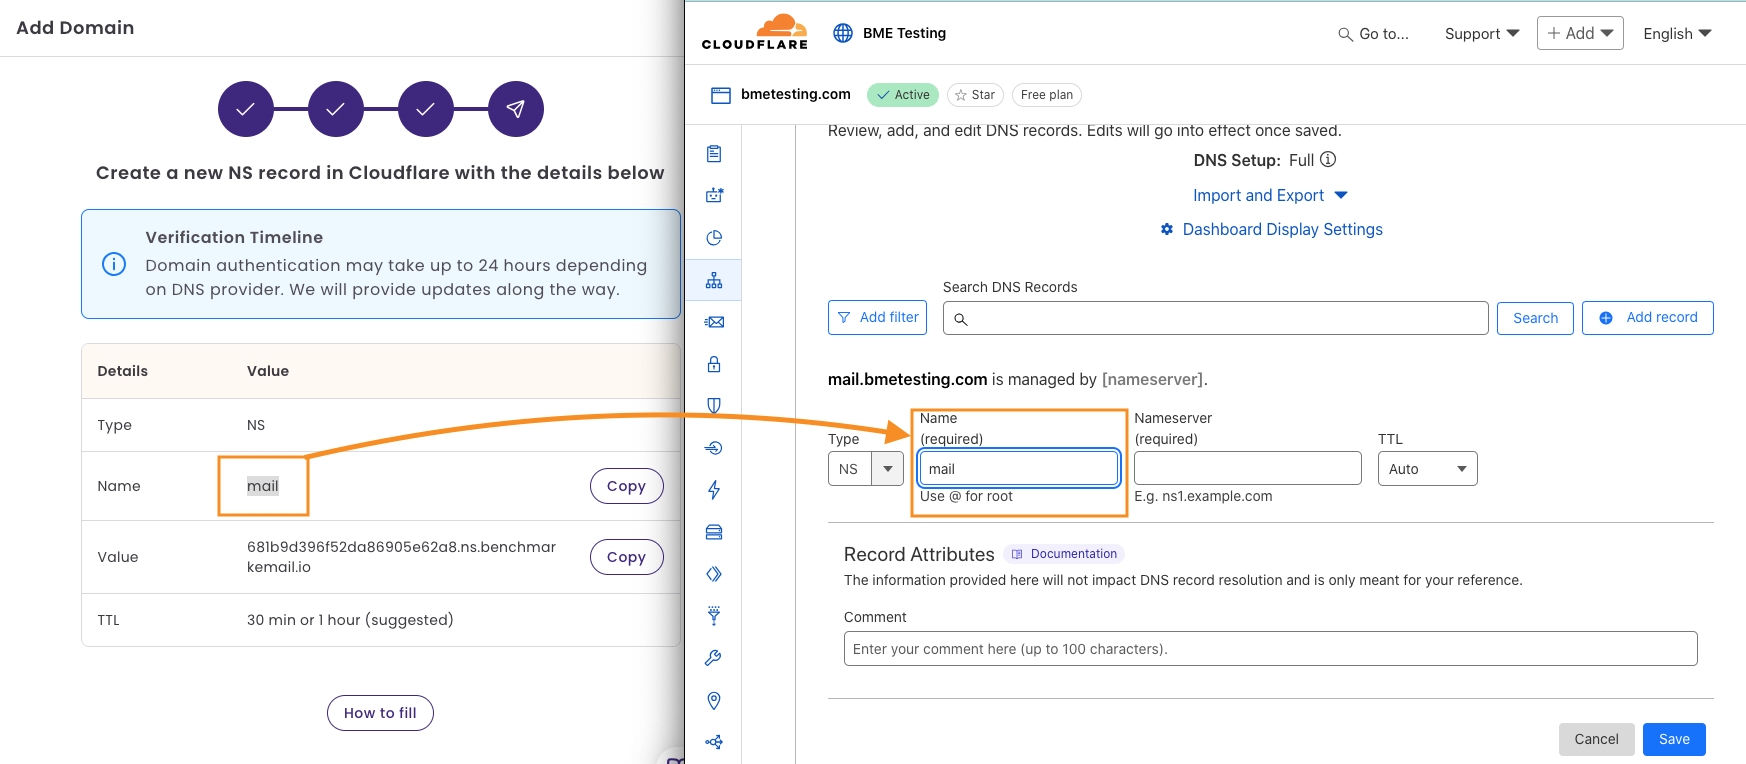
Select the +Add Record option.

- Click on the Record Type and select NS.
-
Next, add the name.
-
Continue by adding the value.
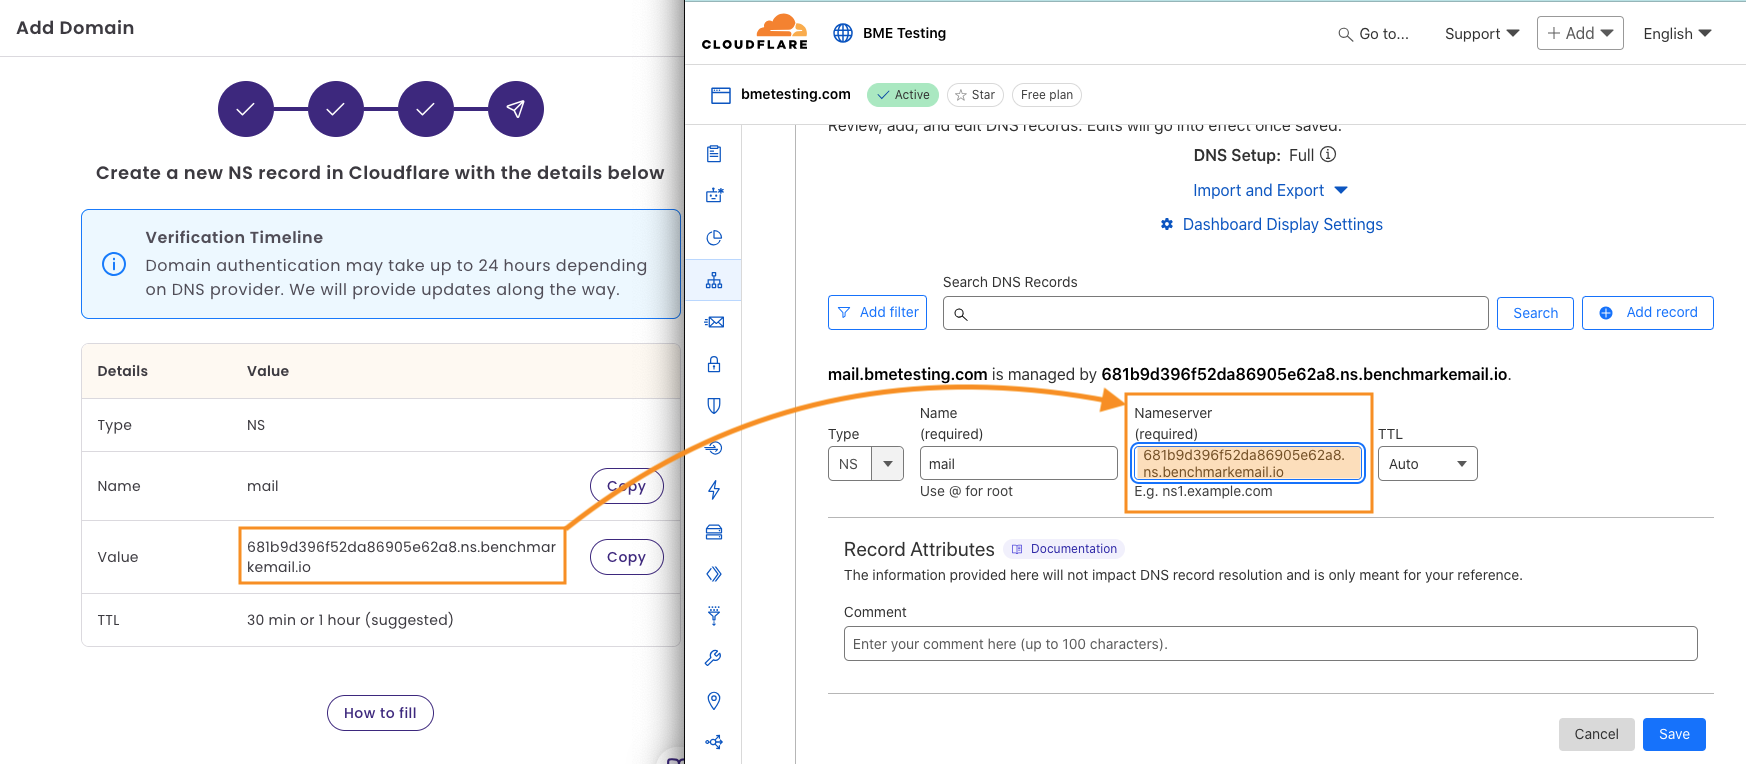
- Set the TTL to Auto, and click Save.
-
Cloudflare provides an option to add comments to each record. The comments do not interfere with the record and are meant for your reference; they could help you identify its purpose.

-
- Back in Benchmark, you can click on Verify Domain.


After adding your NS Record, the domain status will go from Verification Pending to Verification in Progress. Please remember that most DNS updates can take up to 48 hours. Once the domain is ready to use, the status will change to Ready to Send.
Google Cloud
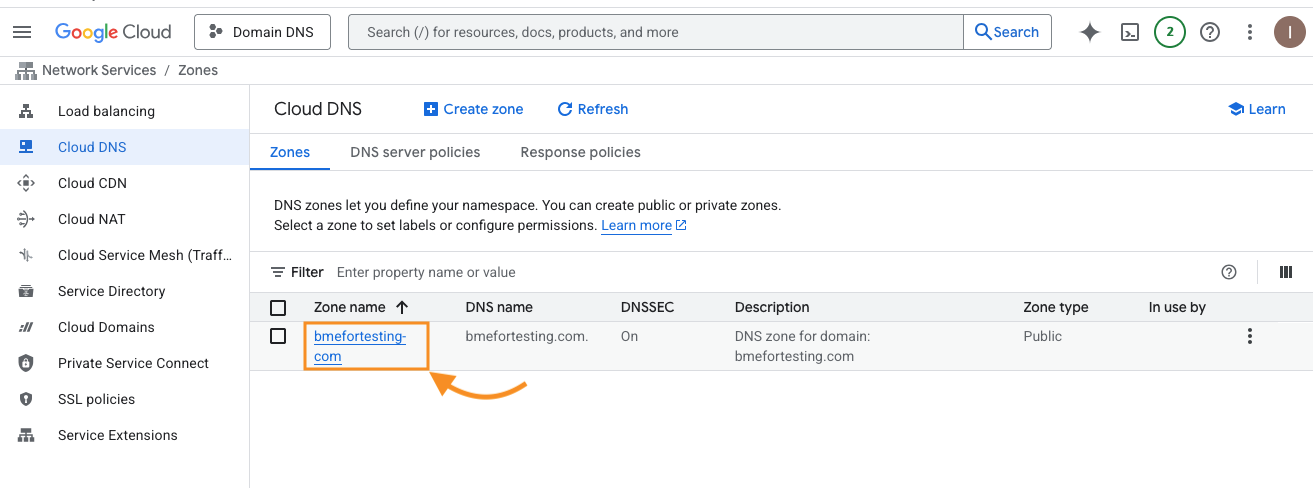
- Log in to your Google Cloud Console and go to Cloud DNS.
-
Click on your domain name.
- Next, select Add Standard.
-
Add the record name.
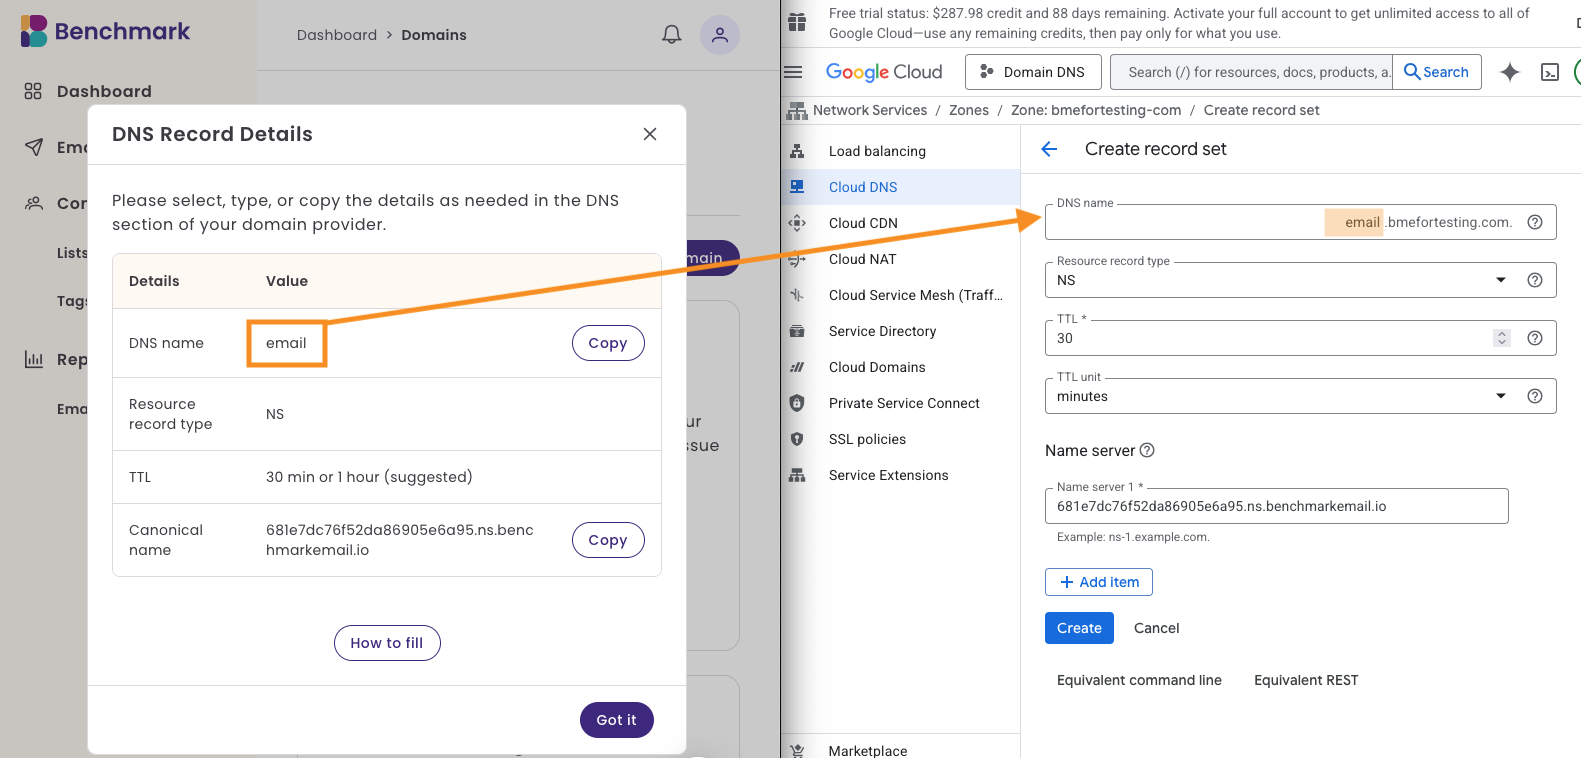
-
Click on the Record Type and select NS.
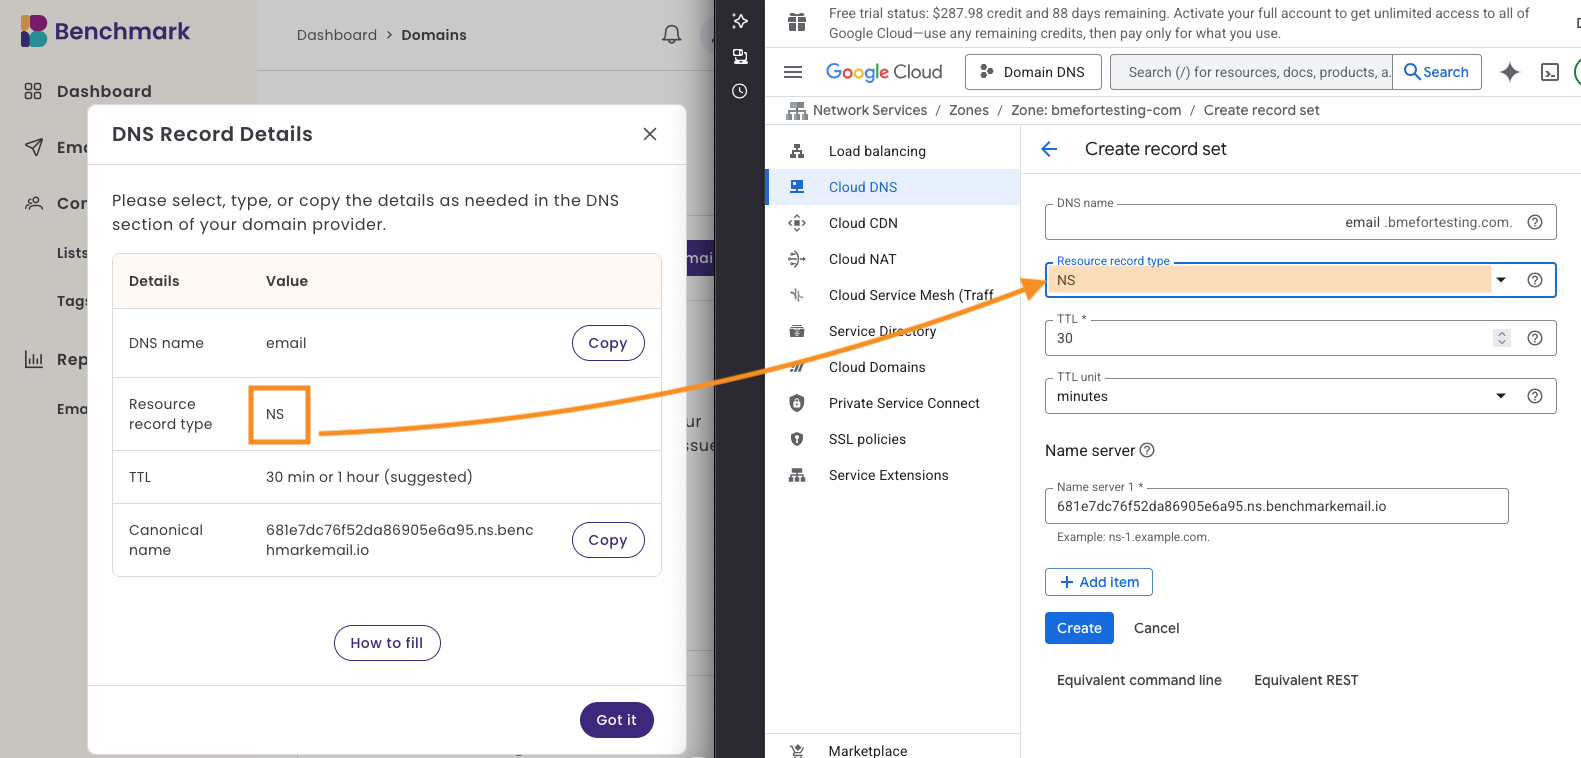
-
Set the TTL to 30 and the units to Minutes.
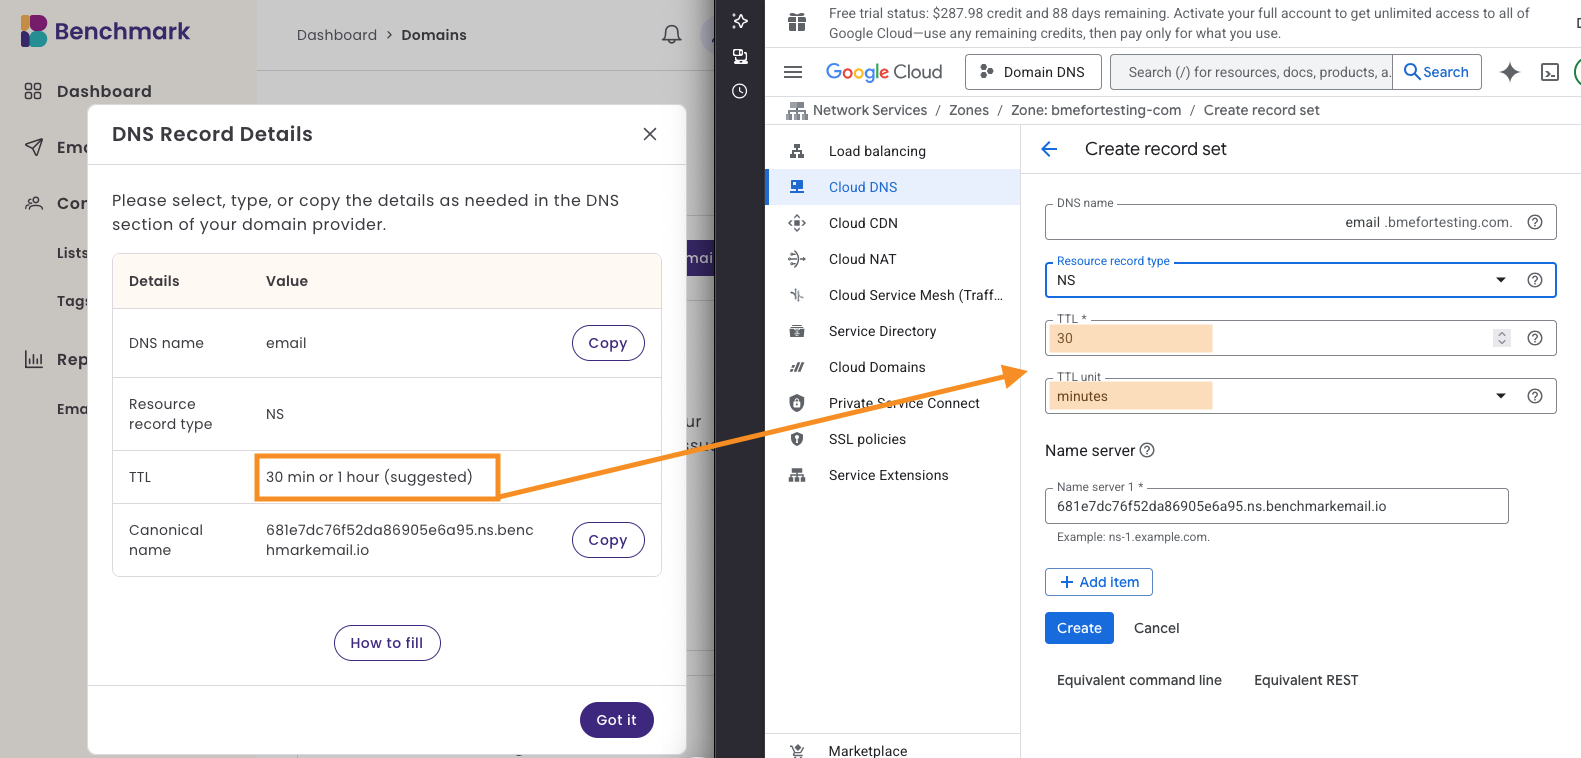
-
Add the nameserver value.
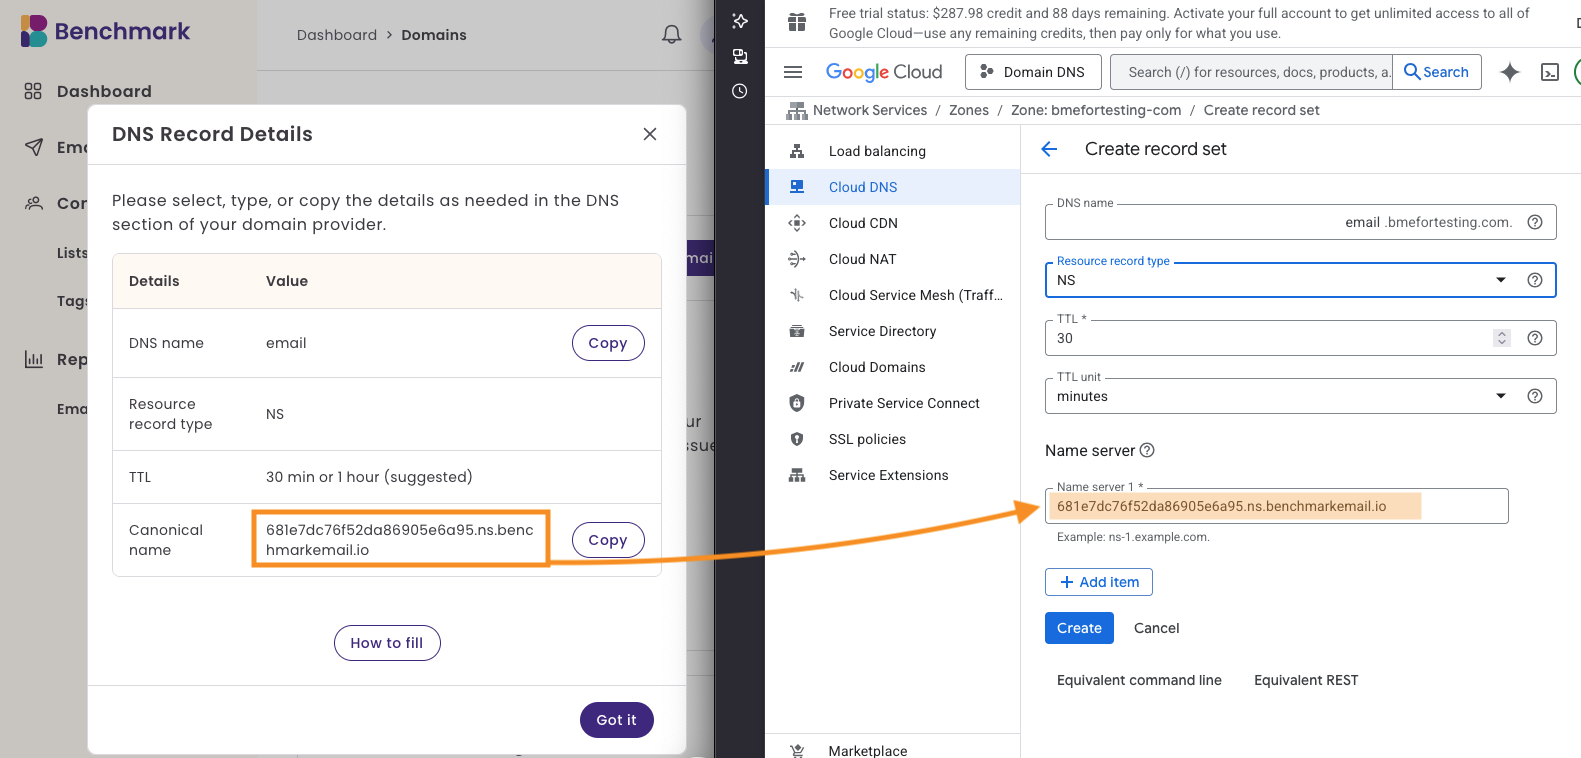
- Last, click on Create.
-
You will see a pop-up stating that the record was created.


After adding your NS Record, the domain status will go from Verification Pending to Verification in Progress. Please remember that most DNS updates can take up to 48 hours. Once the domain is ready to use, the status will change to Ready to Send.
XServer
- Log in to XServer and navigate to the Server Management (Server Panel) section.
-
Go to “ドメイン(Domain)” > “DNSレコード設定(DNS Record Settings).”
-
Click “Select” next to the domain you want to configure.
- Click on the “選択する(Add DNS Record)” tab.
-
Enter the values shown in the Benchmark Email domain settings screen into the “ホスト名 (Host),” “種別(Type),” and “内容(Points to)” fields.
- Click “確認画面へ進む (Proceed to Confirmation)”, then click “追加する(Add)” to complete the process.
- Back in Benchmark, you can click on Verify Domain.


MuuMuu Domain
- In a new tab or window, log in to your コントロールパネル(Control panel).
-
Go to “ドメイン管理(Domain settings)” > “ドメイン操作(Domain operation)” > “ムームーDNS(MuuMuu DNS)”.
-
Find the domain name that you want to add the record to, click “変更(Change settings)” >”カスタム設定(Custom settings)”.
-
Scroll down and click “設定2へ進む(Go to Setting 2)”.
-
Next, click “設定を追加する(Add Setting)”.
-
On the Add Custom DNS screen, enter the サブドメイン(Host), 種別(Type), and 内容(Points to) using the information provided on the Benchmark Email domain settings page.
- Click "設定を追加(Add Setting)" to complete the configuration.
-
Back in Benchmark, you can click on Verify Domain.


Frequently Asked Questions
What are NS records, and why are they important?
NS (Name Server) records tell the Internet which name servers are authoritative for your domain. These records direct DNS queries to the correct server for domain resolution.
How long does it take for NS record changes to propagate?
Propagation can take anywhere from a few minutes to 48 hours, depending on TTL settings and caching by ISPs.
Can I use multiple email providers and have multiple DNS records?
Yes, you can use multiple email providers. Each provider has their own set of records and are unique to your account.