Managing Contact Fields
Custom Contact fields allow you to store additional information about your contacts beyond the default fields, such as email address, first name, and last name. These fields help you organize contacts, create targeted lists, and personalize email campaigns.
Topics covered in this article:
- Contact Fields in Account Settings
- Create Contact Fields in the Import Process
- How to manage, reorder, and delete custom fields
- Using Contact Fields to filter and create contact lists
BEFORE GETTING STARTED
- If you delete a custom field from the Account Settings page, all associated data in contact records will be permanently removed and cannot be recovered.
- If you rename a custom field, it will automatically update across the entire account.
- The first name and last name fields can not be modified.
Contact Fields from Account Settings
- Start by logging into your account, clicking on your account avatar, and then selecting Account Settings.
- Select Contact Fields. By default, you will see fields for email address, first name, and last name.
-
Click on Add Field to create a new contact field.
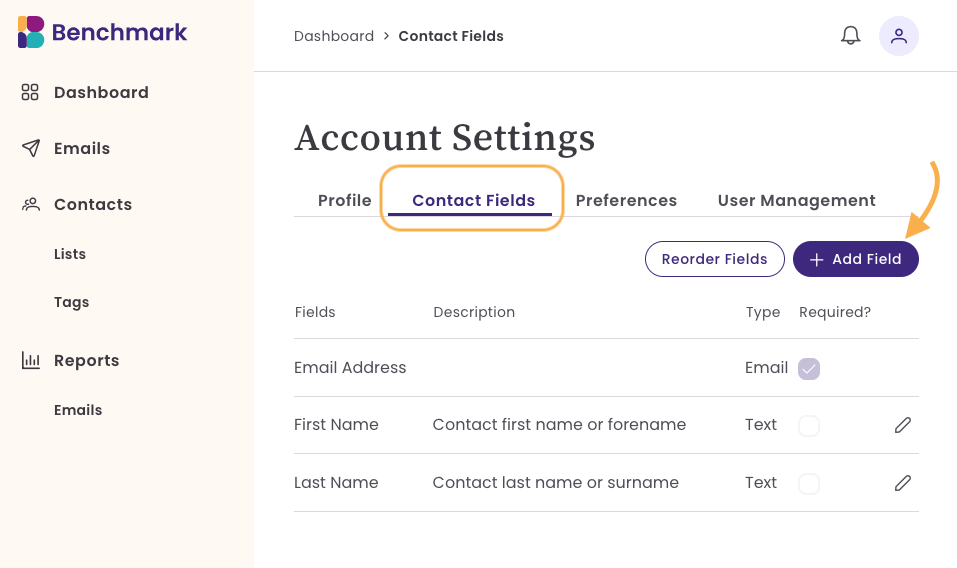
- Select from the predefined fields or click the +Add custom field option to create a new field.
- Predefined Field Names or Field Types are not editable.

Available Predifined Fields
- Company
- Job Title
- Phone Number
- Website
- Address
- Birthday
Creating Custom Field
When creating a custom field, you need to assign the following:
Field Name: This name will be visible in your contact dashboard. You can select it as a contact field during the import process. Additionally, you can filter contacts and create lists using the field name.
Field Description: This information is only visible on the Account Settings> Contact Fields page.
Field Type: This refers to the type of data that will be stored in the field. Here are the available feild types:
- Text (for names, cities, job titles, etc.)
- Number (for numeric data such as phone numbers or a transaction amount)
- Date (for birthdays, appointment date, etc.)
Required Field: By making the field "Required," you require that it be filled in when adding or importing contacts. If it is not filled in, the contact can not be saved.
To create a custom field, follow the steps below:

- Enter a field name (e.g., "Time Zone").
- Add a field description to clarify its purpose. This is optional.
- If necessary, mark the field as required.
- Click Add to save the custom field.
✅ Once created, the custom field is available for all contacts in your account.
Create Contact Fields in the Import Process
You can also create contact fields during the import process. Follow these steps to learn how to create contact fields while importing a file.
- Start the import process by uploading a contact file.
- You will see a list of available fields during the field mapping step.
- If the field you need isn’t listed, click Create Custom Field from the dropdown menu.
-
Enter a field name and description and select the field type (Text, Number, or Date).
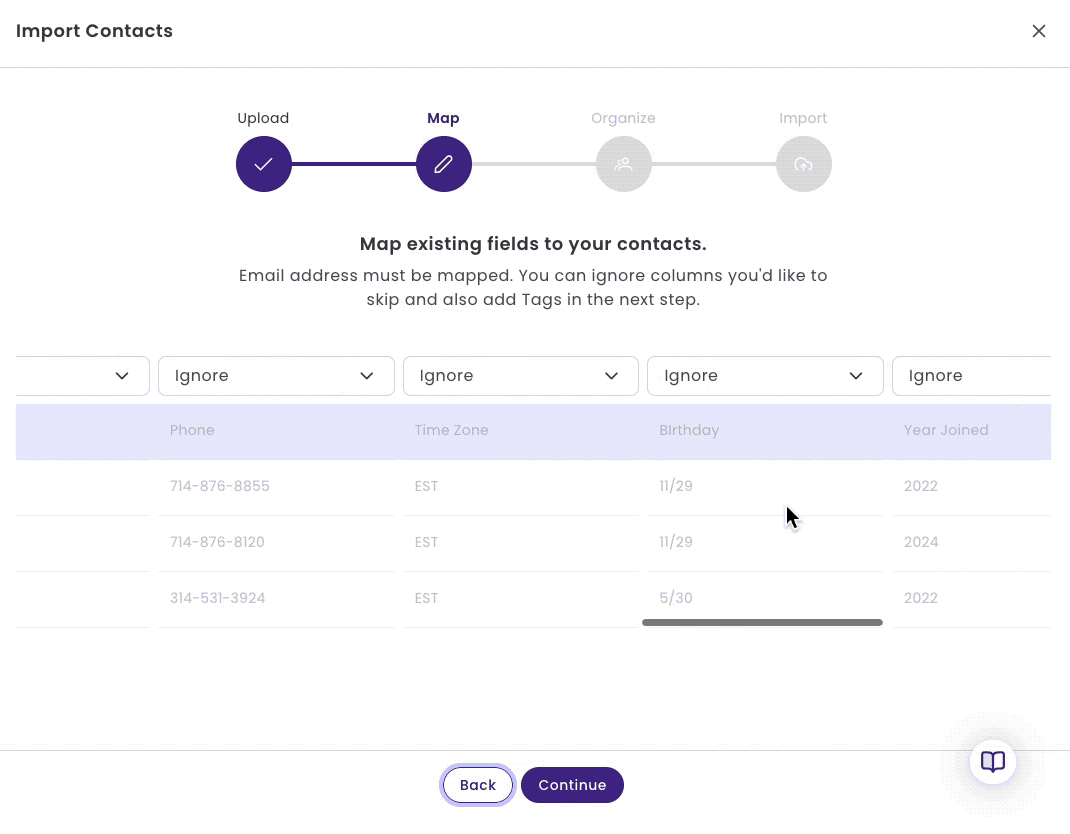
- Select if the field is required. This is optional.
- Click Save, and the new field will be created and applied to your account.

Managing Custom Fields
Once you’ve created custom fields, you can modify them as needed:
Renaming a Custom Field
If you rename a custom field, it will update your entire account, and all contact records with that field will reflect the change.
Deleting a Custom Field
If you delete a custom field, all associated data will be permanently removed from your account.
Reordering Custom Fields
You can change the order in which your custom fields appear in the Contact Dashboard:
- Drag and drop the fields into your preferred order.
- Click Save to apply the changes.
- The new order will be reflected in your Contact Dashboard and Contact profile.
Using Contact Fields to filter and create contact lists
Once your Contact Fields are set up, you can filter your contacts and create Lists.
Filtering Contacts by Contact Fields
- Go to the Contacts section.
- Use the Filter option to search for contacts that match a specific field value (e.g., all contacts from "New York").
- Apply the filter to display only those contacts that meet your criteria.
Creating Lists from Filtered Contacts
- After filtering contacts, select them and click Create List.
- Give the list a name (e.g., "New York Customers").
- Save the list for future email campaigns.
This allows you to send targeted emails based on custom fields such as location, company, or other personalized data.